Hey all! We are back home after a truly amazing ten days of family fun and hands on history on the East coast. I’ve got a bunch of upcoming posts I’m excited to share with you, including the big trip recap, my latest Netflix binge watch, and the beginning of a new series on the blog called “kids cook for themselves” featuring recipes that big kids can can make all by themselves, freeing YOU up to spend more time reading blogs.
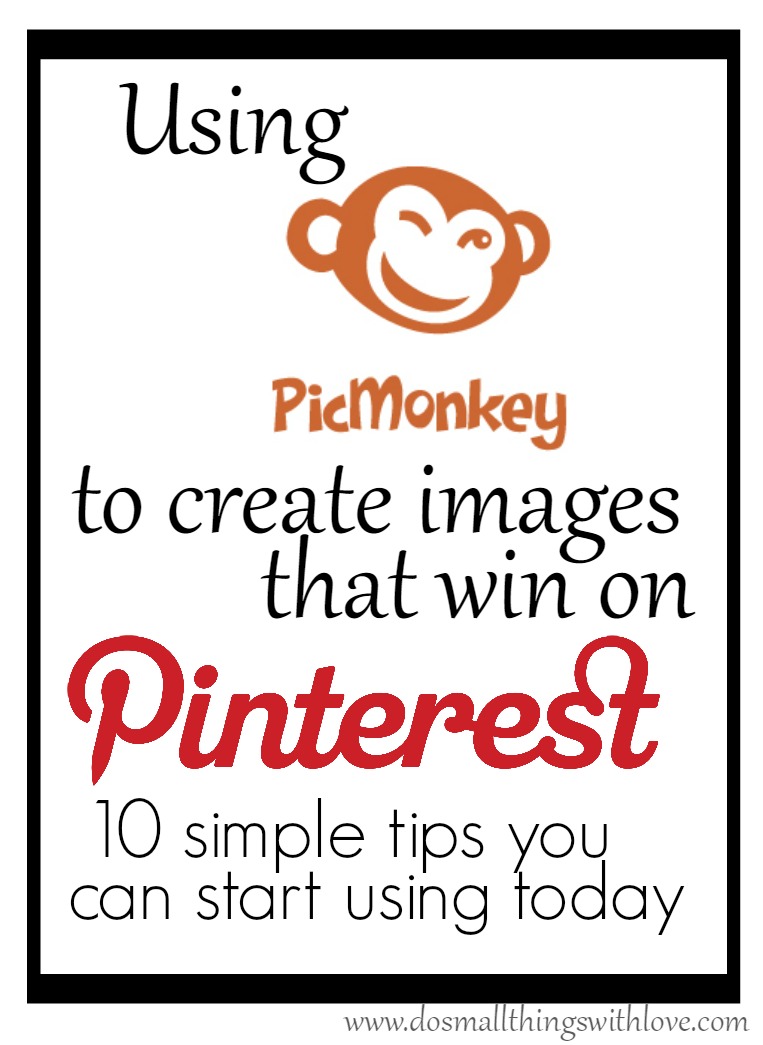
But FIRST . . . I know I said I was done with the PicMonkey posts, but I was wrong.
Nancy from Do Small Things With Love saw my earlier posts and offered to give us all some tips on using PicMonkey for Pinterest. And since I KNOW I’m not using Pinterest as well as I could be . . . I accepted.
Hi, my name is Nancy, I blog at www.dosmallthingswithlove.com, and I am addicted to Pinterest traffic.
As bloggers we all know that any sort of traffic is good–but I get about 80% of my traffic from Pinterest. Because of that traffic I have been able to turn my blog into a business that is actually contributing to my family financially right now. And here’s the thing ladies, more Catholic Bloggers need to join me on Pinterest because it can be such a powerful way to share your content.
There is only one social media network with the sole and absolute purpose of sharing content. Pinterest.
Sure, more people use Twitter, but for all sort so reasons, only one of which is sharing content. Sure, Facebook is more personal, but with the constantly changing logarithms it often feels impossible to reach all of your followers.
And so, it is time to give Pinterest another try. We do this through creating Pinnable Images.
Before you tune me out hear this: Pinterest is used to share all sorts of content–not just recipes and crafts. In fact some of the all-time most popular pins have nothing to do with food or hot glue. No matter what you blog about you should be adding pinnable images to most of your posts. Not all of your posts (we’ll cover this in a minute). Kendra has laid out exactly how to use PicMonkey to make your photos great. Now it’s time to add just a few details to this so that your images can win on Pinterest as well.
Before I dive in I just want to note that, as with all social media networks, there can be a lot of strategy that goes into using Pinterest as a blogger. I am not going to cover growing your pinterest following, group boards, rich pins, scheduling pins, switching to a business account or promoting pins. If you are serious about using pinterest to grow your blog I recommend googling these topics as the internet is rich with information on Pinterest.
The following 10 tips will make your images “Pinnable”–and all of this can be done using PicMonkey.
1. Is This Post Pinnable?
Start here and ask yourself is this post pinnable? To be pinnable a post has to be:
- Evergreen–meaning it is timeless. A post recapping your family’s trip to San Francisco is, um, not timeless. However, Kendra’s post on the Mommy Wars is totally timeless (cause we will always be flawed), and therefore pinnable.
- Intended for the Masses–Pinterest is impersonal. We are all just scrolling through and clicking on pretty images that catch our eye, so in order for a post to be pinnable any one and everyone should be able to jump into this post, having never been on your blog before, and enjoy it.
- A Problem Solver–This is the most important question to answer. In what way are you offering help to those that read? Are you offering tips, tricks, a recipe or advice? Are you sharing a personal story others can learn from? Are you answering a question lots of people have? If you answered yes to any of these questions, your post is pinnable and needs a pinnable image.
2. Vertical Images are a MUST on Pinterest
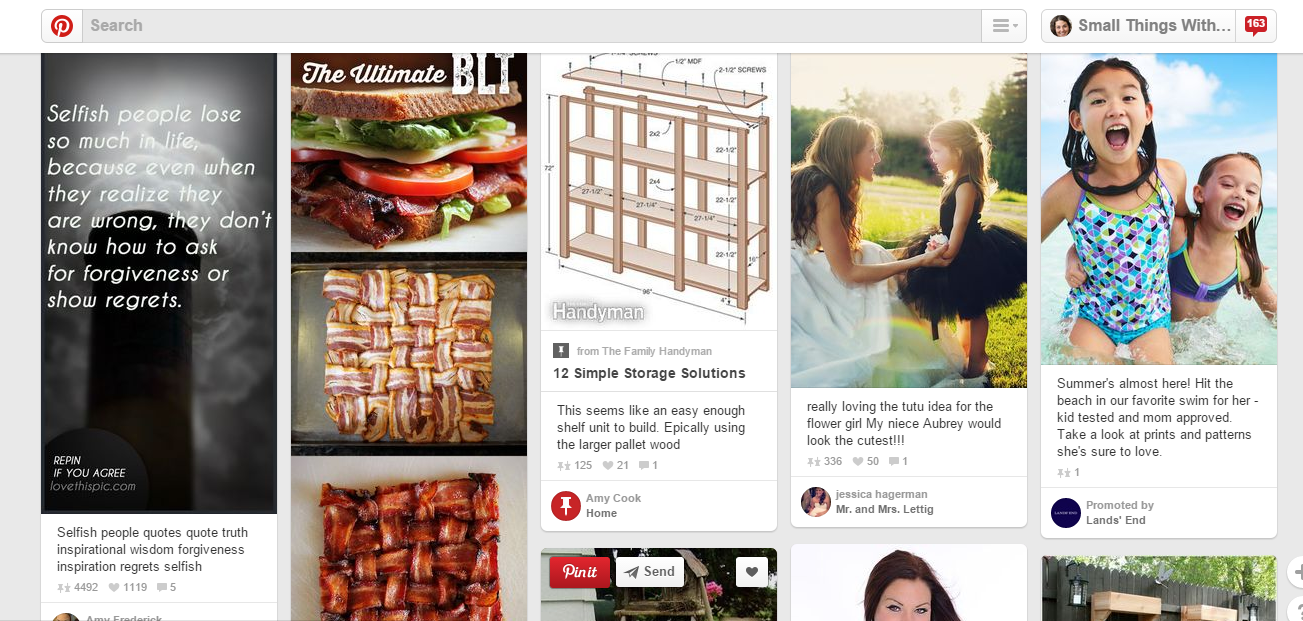
Just check out a normal Pinterest feed and you will see why vertical images on Pinterest are a must
Simply put, vertical pictures get more real estate on Pinterest. Just check out that Ultimate BLT pin!
On the flip side, Facebook does better with horizontal images. I know this sounds like a lot work, but for the posts I have really worked on and really want to take off, I often edit and create 2 images–one for pinterest and one for Facebook. Once you get this in your routine it really doesn’t take that much more time, just moving the text, cropping and saving the same image twice.
Here are the 2 images I created for a post I recently wrote about waiting to have sex until marriage:
For Pinterest

And for Facebook:

3. Crop Closer

When creating pinnable images always keep in mind what a Pinterest feed looks like: image after image after image. For this reason you really want yours to stand out! Don’t waste space on background or scenery. Use PicMonkey to crop your image in nice and tight, without loosing any of the picture’s quality.
Here is one of my most pinned posts ever, Easy Watercolor Portraits.
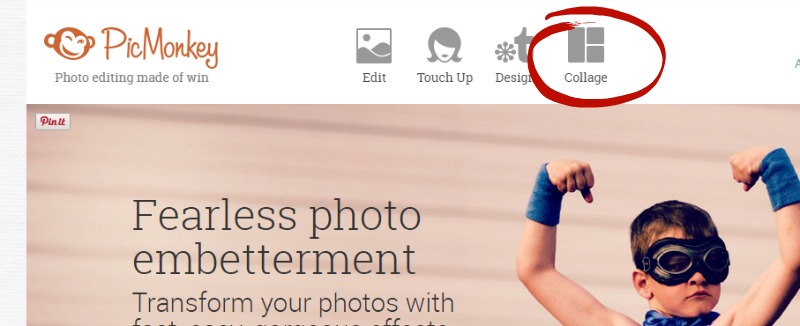
As you can see I used several images for this “Pinnable Image”, but each one is cropped nice and close so you can see exactly what is happening. Creating a collage like this is also something you can do in PicMonkey. Simply select the collage option on the front page. Then, upload the pictures you’d like to use and drop them into place. After you have them collaged your pictures you can easily click over to do some basic edits on the collage as a whole.
Once again–just make sure your collage “Pinnable Image” is vertical!
4. Create Images that are WARM and BRIGHT
Loads and loads of research has been done to see which pins on Pinterest get interaction, and which don’t. Over and over the pins that were BRIGHT and WARM got clicks and repins, so when selecting your image look for one that is nice and bright–and by that I mean “true white”. Kendra did an excellent job discussing how to brighten images with PicMonkey, so I won’t go into that but it is well worth it to spend a few minutes in the editor brightening up your pinnable image. Also, opt for images with warm colors, like reds and yellows, over pictures with cool colors like blues.
5. Leave Room For Wording
A pinnable image is 2 things–an image and words–not an image under words. Although I already stressed cropping your pictures nice and close, make sure you don’t crop too close. You want to leave room for your wording. Check out this example:
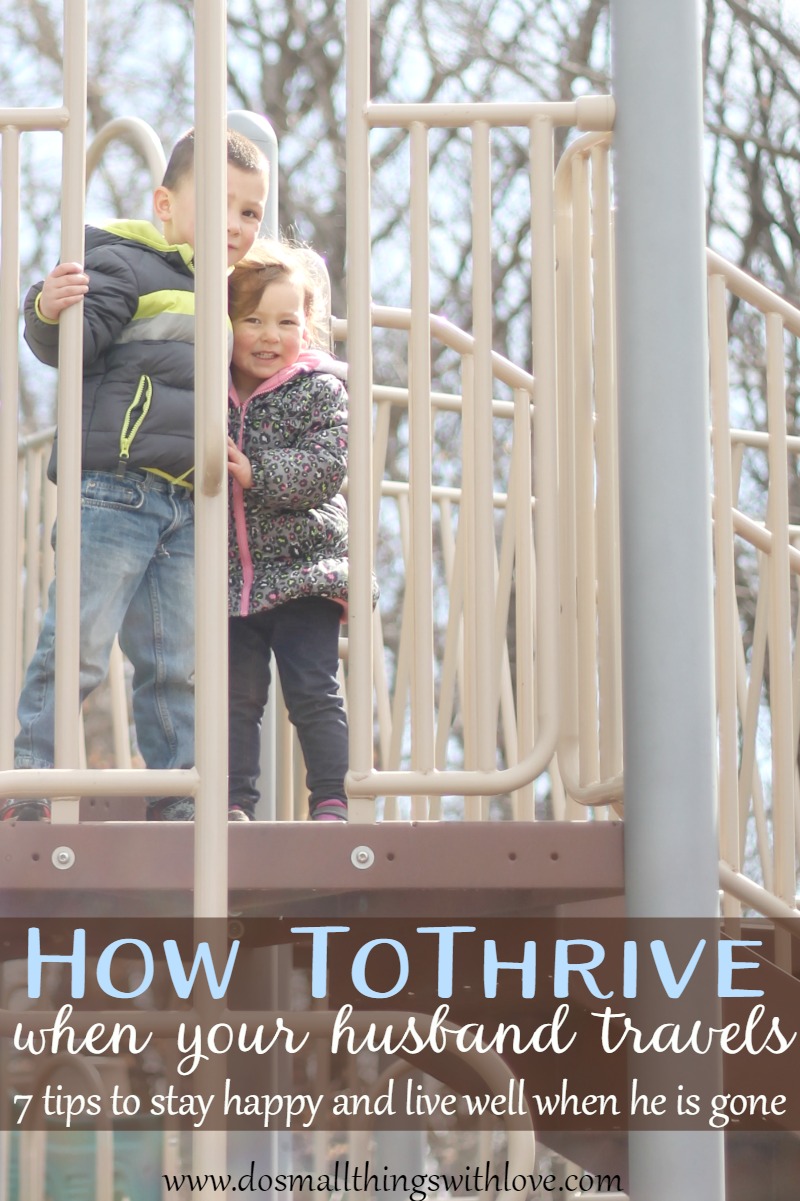
Because I knew this post had a long title I left lots of space for wording and added an overlay so that my wording stood out a little bit better.
6. Keep Wording Brief and CLEAR
Remember that Pinterest is all about IMAGES–so don’t go overboard with the wording. Pick fonts that stand out and write a title that will engage your audience immediately! For example, instead of writing, “when your husband is traveling it is possible to stay happy,” I wrote, “How to Thrive when your husband travels.” The title I choose offers something to the reader and uses more emotional words–making it more likely to pull in a reader.
7. Add a By-Line
Most of my pinnable images offer a title and a by-line. The title is intended to pull people in and the by-line works as a tiny preview of the article. Once again, keep it simple and direct. As both a reader and a writer I am attracted to lists and so very often my by-line is something like “7 Lessons on Motherhood I Learned from Mary“. Or, sometimes the by-line simply explains the title further. I recently shared a post called “Bonded Through Work” with the by line, “Creating A Family That Works Together”
8. Create a Word-Only Image
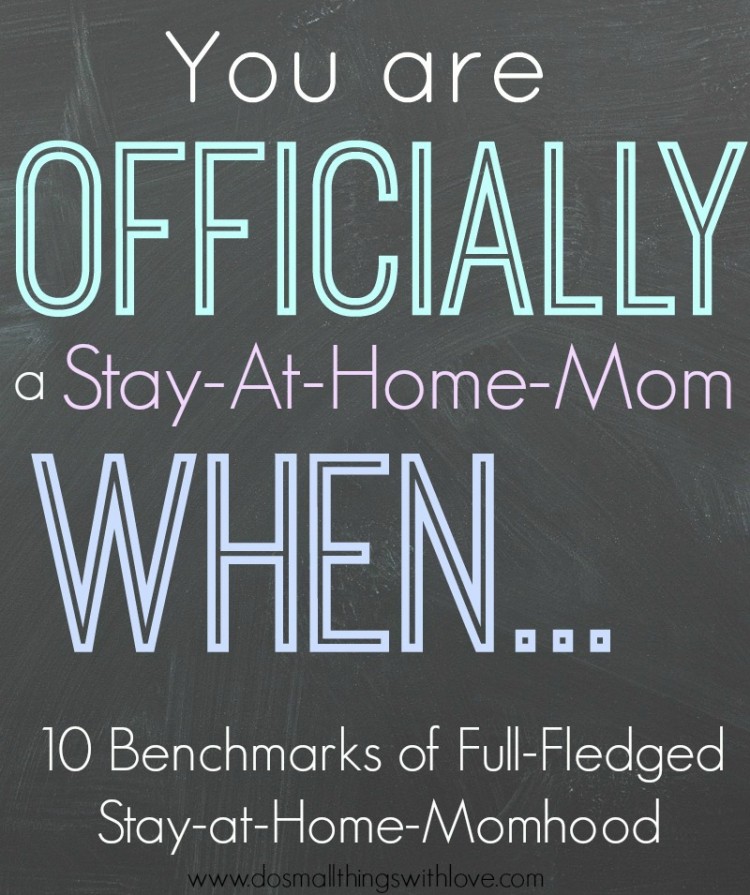
Sometimes adding a picture as the pinnable image for a post just doesn’t seem quite right. For these situations I simply use the tricks Kendra covered in THIS POST and create a word-only image (or word art). Here is an example of a word-only pinnable image I made.
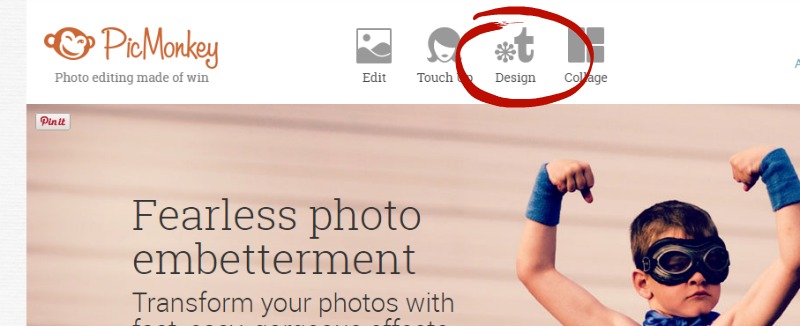
To make a word-only image, start with the “design” option on the front page of PicMonkey.
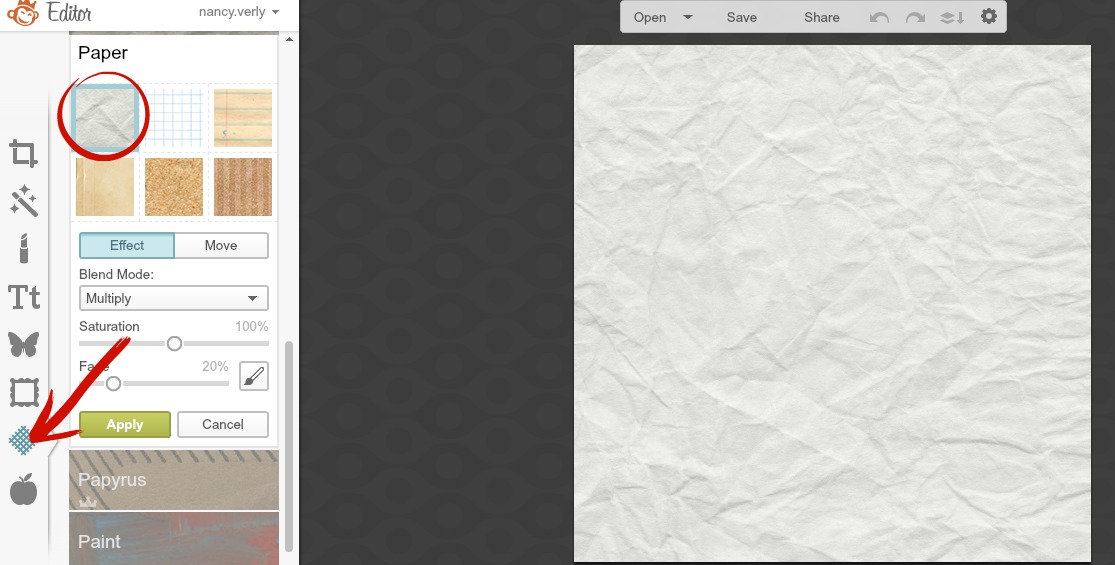
From there I often select a “texture” to add to my image. There are lots of great options here. In the above pinnable image I used a “chalkboard” texture. Below I have selected a crumpled paper look.
After I have the background I’m after (sometimes I even layer textures for a unique look) all that is left is adding wording and Kendra has done an excellent job covering this already.
9. Be Consistent in Your Editing
When you set to work creating “Pinnable Images” you are really working to create beautiful images–images that communicate who you and your blog are. Chances are you have put considerable time and energy into styling your blog in terms of fonts, colors and images–and you should work to let that style show through in your images. All I am trying to say here is that you should deliberately choose which fonts to use in your pinnable images and work to use those fonts in each image. Each pinnable image won’t be the same, but they should have traces of the same style. Also, try to use the same sorts of overlays. Ideally (and likely a ways down the road) a reader should know it’s your image before they see your logo.
10. Save Images as Your Pin Description
If you get nothing else from this post, get this–Save Your Image as The Description You’d Like It To Have on Pinterest. If your image is saved as “IMG123456” than that will likely be the default description Pinterest will use. Sure, a pinner might take the time to write a wonderful description for you, but they might not. So, take a minute to write a description in that “save as” box, even if it is long and obnoxious.
The habit of naming your pictures this way is something you should really work to do as it will also help boost your SEO, but that’s another topic entirely.
Okay, did I cover everything? I hope this isn’t overwhelming–but just helpful. Serious Catholic bloggers belong on Pinterest too and I hope that these tips help you take advantage of this powerful social network.
Thanks to Kendra for letting me be with you today! I’d love to connect with you either at my blog, on facebook or (of course) on pinterest.

Whew! Thanks Nancy. I’ve got a lot to work on.
In case you missed any of the earlier PicMonkey posts, you can catch up on them here . . .
Using PicMonkey to Make Word Art
Using PicMonkey to Make Graphic Designs and Pinnable Images
Don’t Make These Mistakes Using PicMonkey to Make Shareable Images
Using PicMonkey to Make Good Photos Great and Bad Photos Pretty Good

Nancy, great tips. I'll add to number 10 – RICH PINS! If you're a blogger, you should be applying for those (they're free). It makes you more credible among pinners and boosts your reach. If you haven't already, I highly recommend taking Melissa Culbertson's class, Pinning Perfect. She talks about a fair amount of what you covered, plus writing descriptions, collaborative boards, etc. http://shop.blogclarity.com/
great tip–and totally, Rich Pins make a huge difference!
This is wonderful information. THANK YOU. I rarely use Pinterest… but thanks to Kendra and Nancy, that might be about to change… 😉
Thank you for these great tips, Nancy! I'll be pinning this post. 🙂
I do have a couple of questions, though, so I hope you don't mind if I pick your brain further. First, if 80% of your traffic is from Pinterest, how many of those people subscribe to your blog and become a part of your tribe? Not to sound lazy, but I'm more concerned with building community and loyal followers than I am with numbers, so how does a bunch of Pinterest traffic change the feel of your blog and how you write?
Yeah, I've always felt kind of the same way, Bonnie. My printable prayers get pinned a lot, but I don't think that those clicks are turning into new subscribers and commenters.
You are right, Bonnie. Pinterest traffic does not easily translate into loyal readers. I would say, however, that I have been able to capture a fair number of readers by making it very easy to connect with me within those hot Pinterest Posts–either by connecting on Facebook, RSS or subscribing to my newsletter. It's almost like I find readers on Pinterest but then move them to another channel so we can stay connected.
Bonnie, I'll add that when I post my faith-based posts, I typically retain some readers because they're coming to my blog because we have a shared faith connection. And, those that come for the organizing or the preemie posts sometimes stick around for varying reasons.
I love these tips!! It's been a while since I pinned much content, but now I am inspired to get back to work on my Pinterest action.
Love all the PicMonkey "how to" posts! I've learned so much and it even helped me save some photos that I thought were headed to the virtual trash can. I have to agree with you, Kendra…I'm not a professional photographer (someday I'll figure out the Manual way to take photos)–but PicMonkey makes me look good! 🙂
Thank you for taking the time to share your tricks and ideas!
This is really a wonderful post.