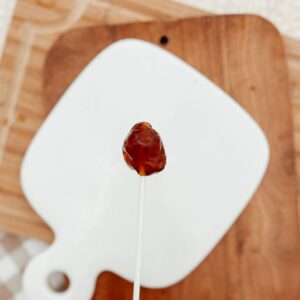
Maple Snow Taffy Pops
Eighteenth-century Jesuit missionaries like Father Sébastien Rale and Father Joseph-François Lafitau described the making and use of maple syrup by the indigenous peoples with whom they lived. Making maple snow taffy is a simple way to enjoy maple syrup as Saint Kateri might have! As you might have gathered from the name, this treat is usually enjoyed during the winter. We don’t have snow at our house, ever. So we might as well make this treat in the summer. All that’s required is to bring real 100% pure maple syrup to a boil, then pour it over “snow” (we make our own in a blender). It cools to a sticky maple taffy that can be rolled up onto a stick. We like to use backyard sticks, as they seem more authentic, but if you prefer your treats to be 100% tree bark-free you might prefer a popsicle stick. P.S. Snowball fight!
Ingredients
- 1/2 cup 100% pure maple syrup other types of syrup won’t work
- A rimmed baking sheet-worth of clean snow or shredded ice
Instructions
- Gather snow, or pulse about 3 cups of ice at a time in a blender until powdery. Repeat until you have enough snow to pat down into a firm layer on your baking sheet. Place it in the freezer.
- Bring the maple syrup to a boil in a small pot on the stove. It will bubble up quite a bit. Using a candy thermometer, continue boiling until the syrup reaches the soft ball stage (235o - 240oF). If you’re not using a candy thermometer, after about 8 minutes begin testing by spooning a bit into a cup of ice water. It’s ready when it sets up in the water to a soft ball. If it dissolves, keep boiling. Once it has reached the correct temperature, turn off the heat and pour the syrup from the pot into a glass measuring cup. Pour it into 6 ribbons over the snow on the baking sheet.
- Eat with fingers or press a stick into one end of the candy and roll it up to create a pop. If the candy has started to set before you get it rolled up, the broken pieces can be softened back up with some finger squishing. Multiple batches can be cooked together, just make sure you have enough room on your snow for pouring, or reheat if necessary, and pour onto the snow in batches.