
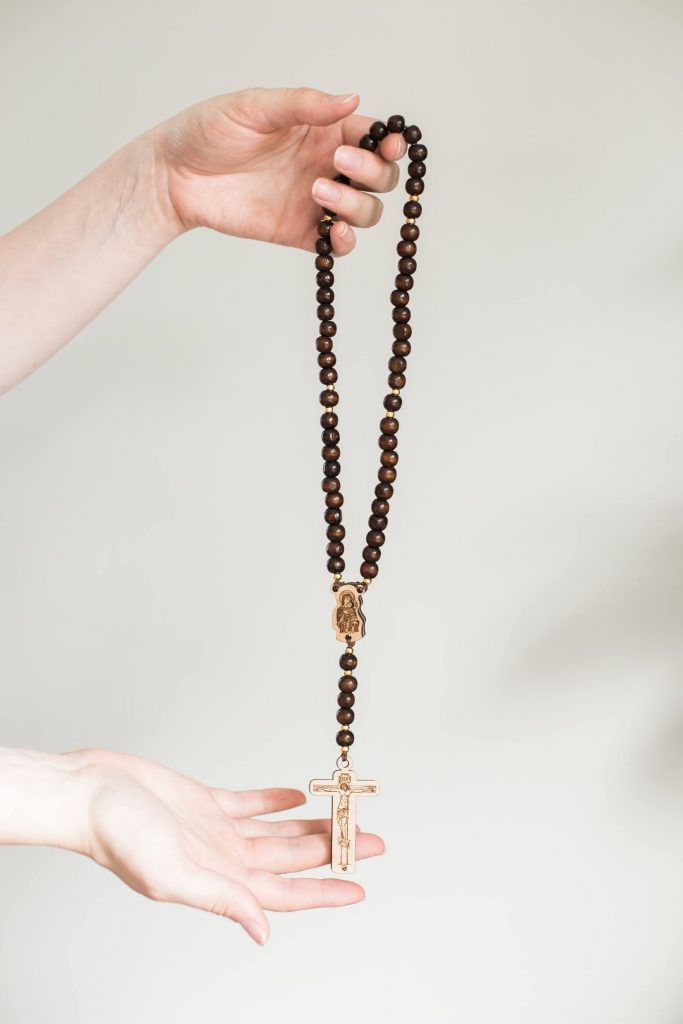
The Month of the Holy Rosary is coming up in October. I’ve written before here on the blog about saying the rosary (and made a video about it), so today I figure you’re already convinced about saying it, and maybe you’d like to make one yourself! Below you’ll find instructions for making both a five decade rosary, and a set of St. Thérèse Sacrifice beads that can also be used as a single-decade rosary.
(A video of this process is coming soon!)

Many years ago, I got my kids rosary-making kits and . . . it didn’t go that well. The kit required them to tie knots between each bead and they just couldn’t manage to get the knots close to the beads. Eventually, *I* took over to try to fix the situation, and I didn’t do a much better job than they had done! We still have those rosaries in our rosary storage crock. They’re pretty bad. So . . . when coming up with a DIY rosary for the CAY Subscription Boxes, I wanted it to be the string style, so it wouldn’t require the tools and knowhow of creating wire links, but also not be dependent on knot-tying skills!
These rosaries can be made by adults and by kids with some adult help, and you don’t need special tools or to be magically able to get a lot of knots to land in particular places. I designed the rosary findings and cut them on my Glowforge. Kits containing all the parts you need are included in the Catholic All Year Fall Ordinary Time Subscription Box. Kits are also available individually. You can also adapt this style of rosary-making to use with your own beads and rosary findings!
Making a Five-Decade Rosary
Find the kit here:
Wooden St. Thérèse Sacrifice Bead / Single-Decade Rosary Kit (Makes 1) – Not currently available
Wooden Rosary + Sacrifice Bead Kit (Makes One of Each) – Not currently available
SUPPLIES

- 59 beads (these can all be the same, or you can choose one type of bead for the 53 ave beads, and a different bead for the 6 pater beads). I used 10mm wooden beads with a 3mm hole.
- 12 spacer beads. I used gold-tone iron beads, 5mm with a 2mm hole.
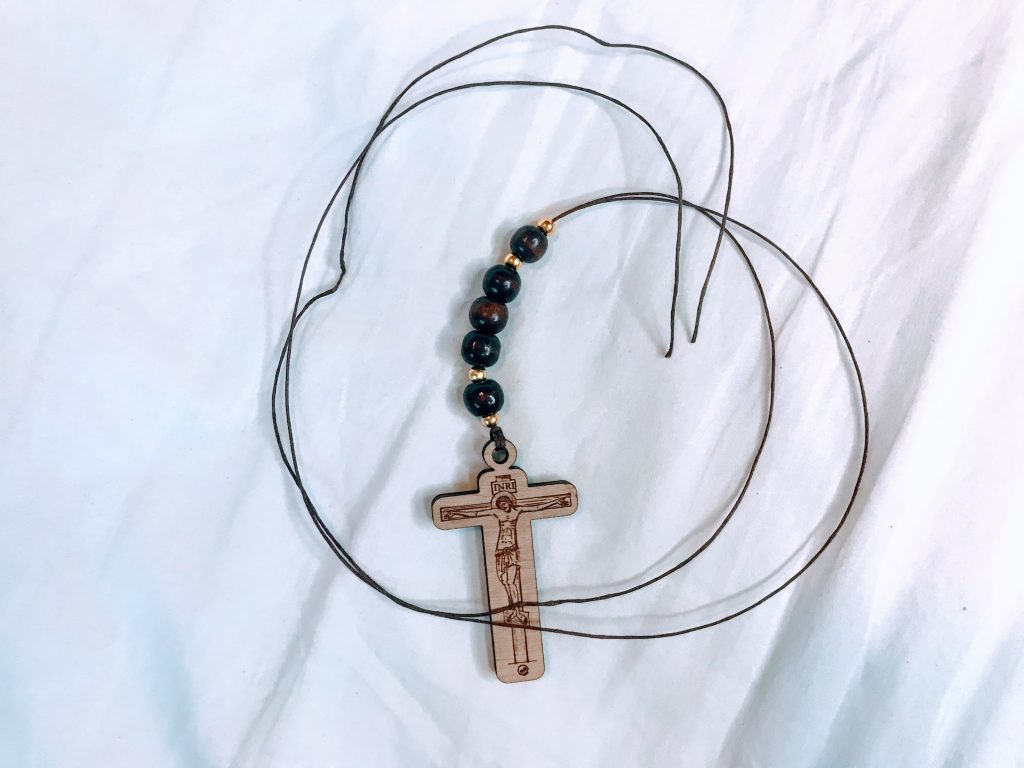
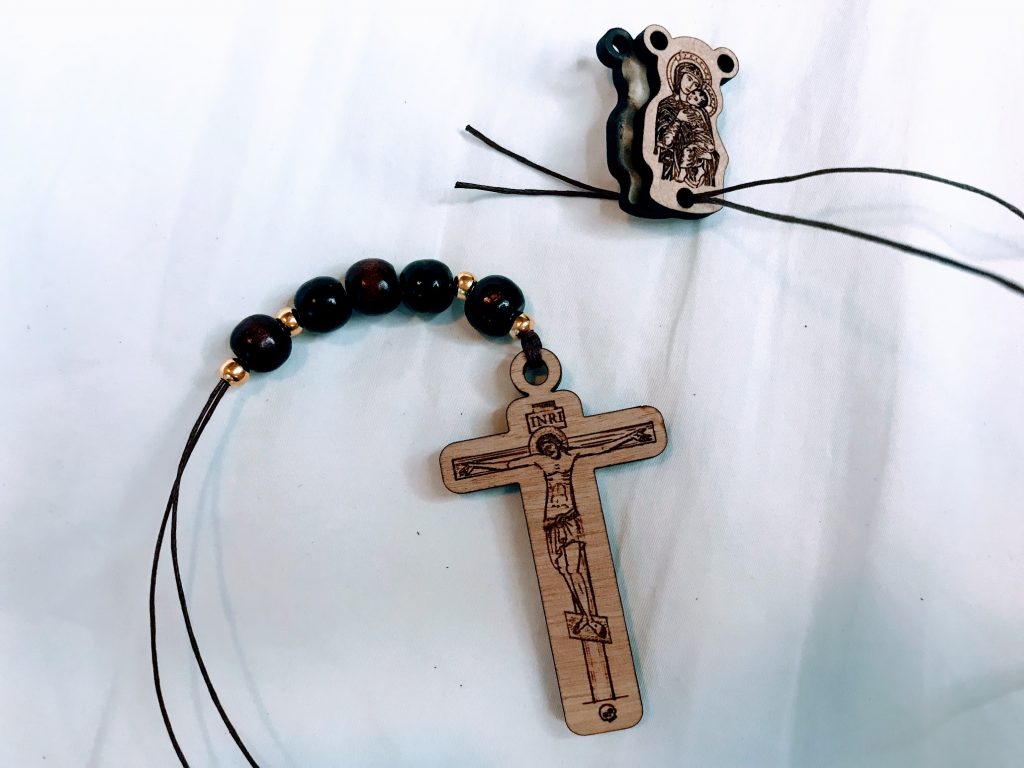
- a crucifix
- two rosary centerpieces. (You can use just one, but there will be string showing across the back of it.)
- 4 feet string. I used 1.5mm waxed cotton thread. (Cut a longer piece if you are using larger beads.)
- scissors
- small needle-nose pliers (optional)
INSTRUCTIONS
Note: I use waxed cotton thread because it’s sturdier and makes threading beads easier. If the end gets frayed, just trim a bit off to get a new clean end. Resist the urge to moisten the end in your mouth, as this will make it floppy and make threading beads more difficult. There is enough extra thread to trim it many times. If a particular bead doesn’t want to go on the thread, use your scissors or pliers to scrape the hole out a bit, or just toss it and grab another.
Tip: Use a kitchen towel to keep the beads from rolling away.
1. Cut a four foot length of thread.
2. Fold the length of thread in half.

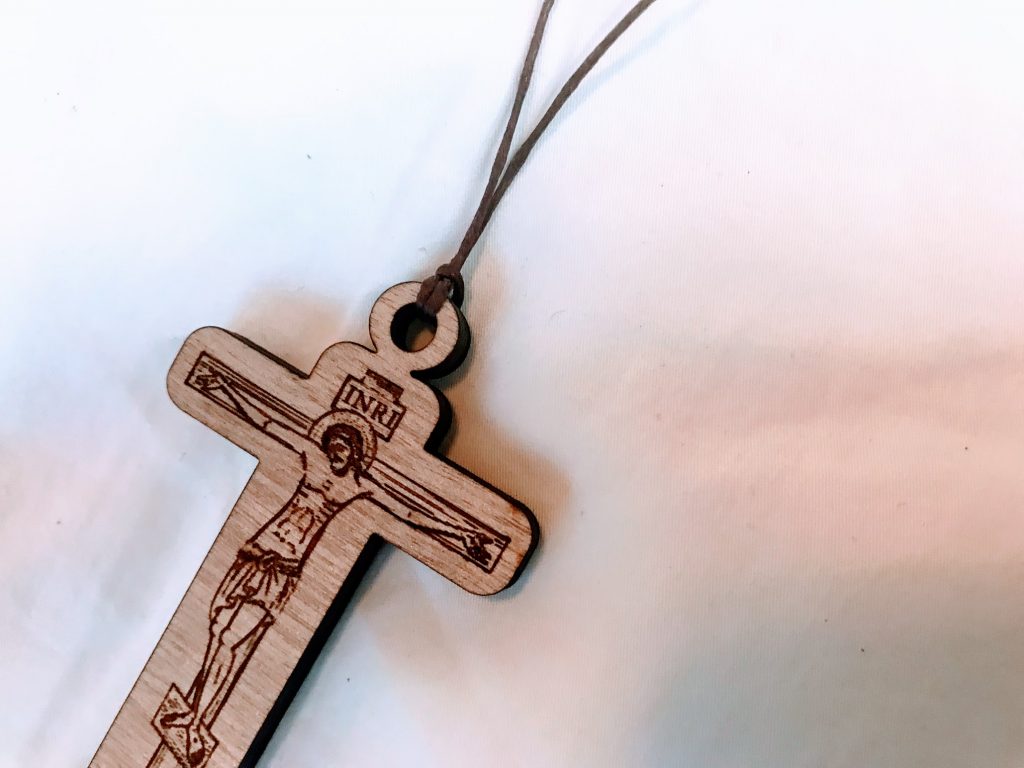
3. Insert the loop end through the hole of the crucifix from front to back and put the two cut ends through the loop.
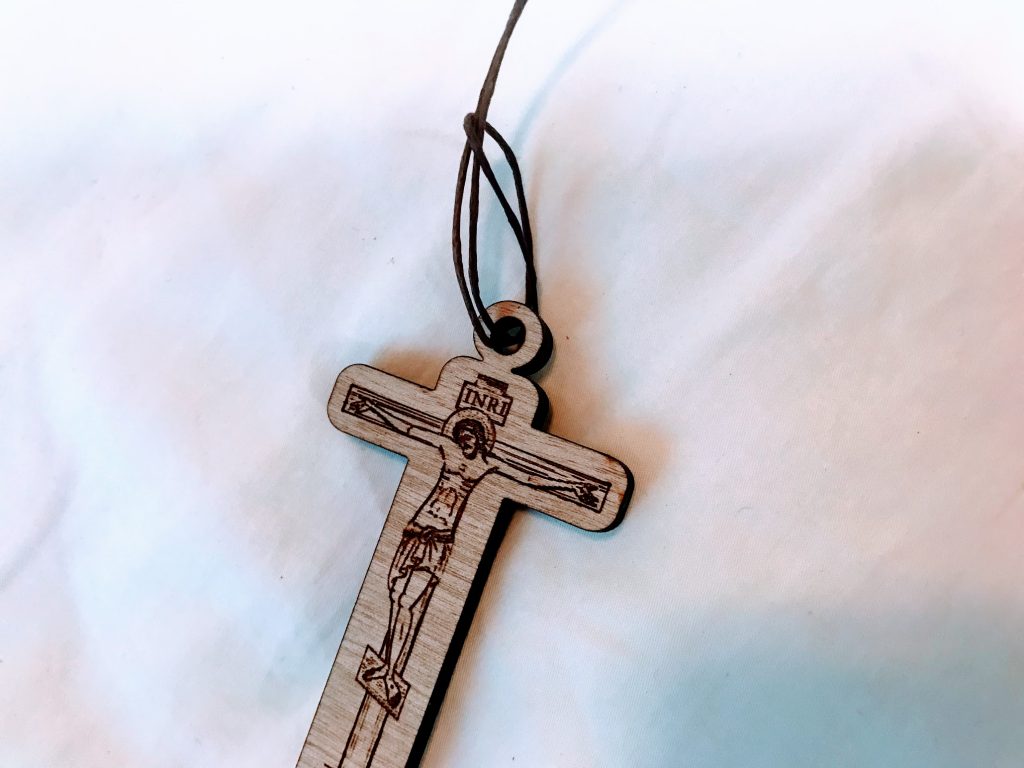
4. Pull and wiggle to tighten the loop down on the crucifix.
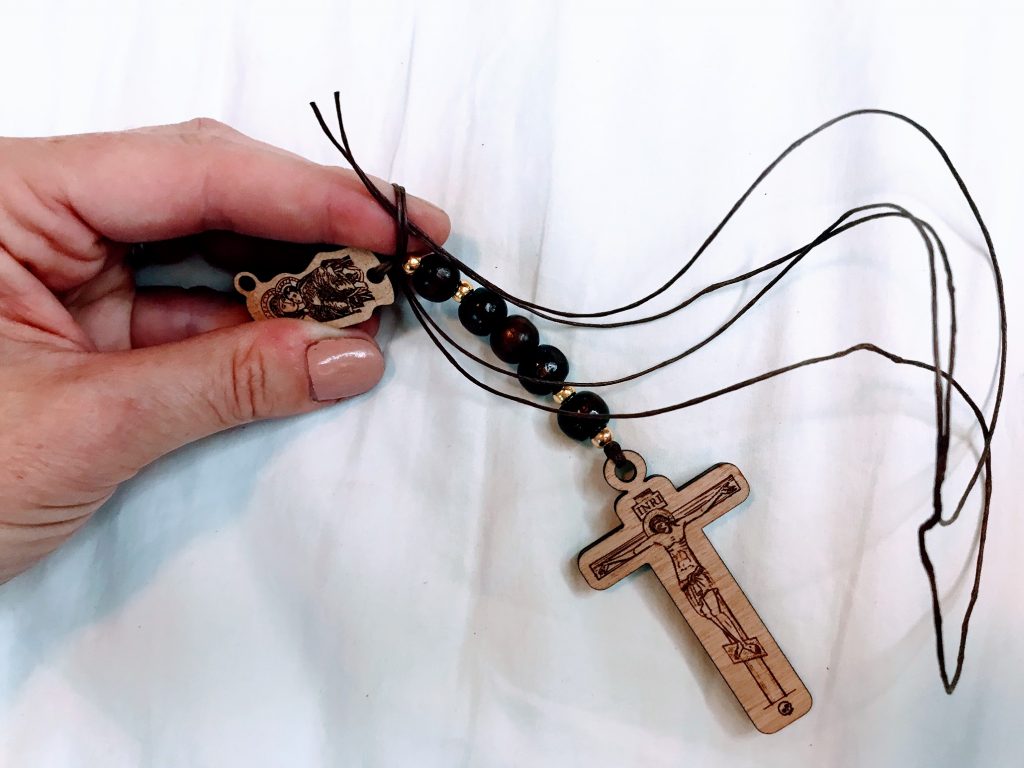
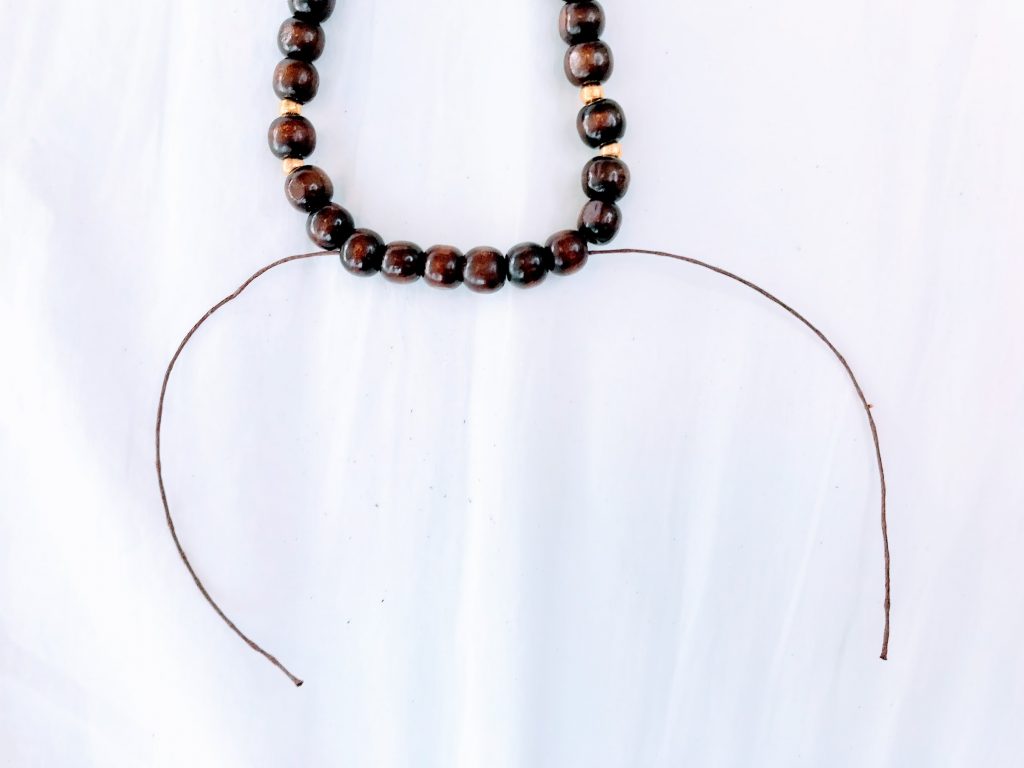
5. If necessary, trim the ends a bit so they are un-frayed and even. Insert both threads into beads in the following pattern: G (gold bead) – W (wood bead) – G – Wx3 – G – W – G.
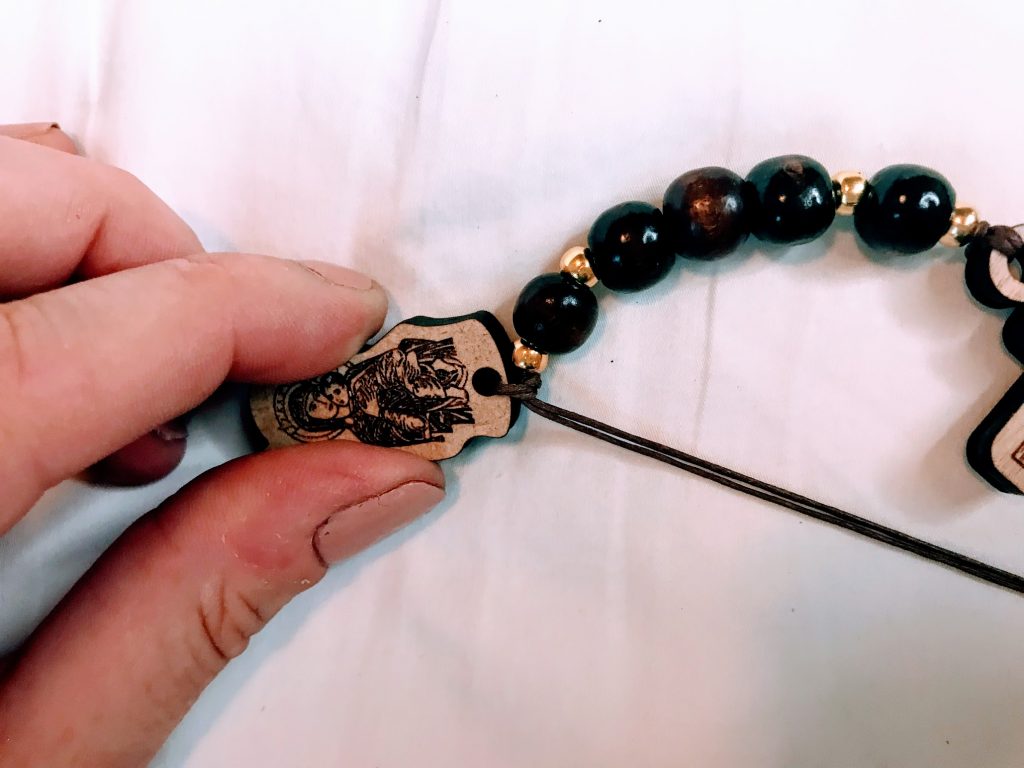
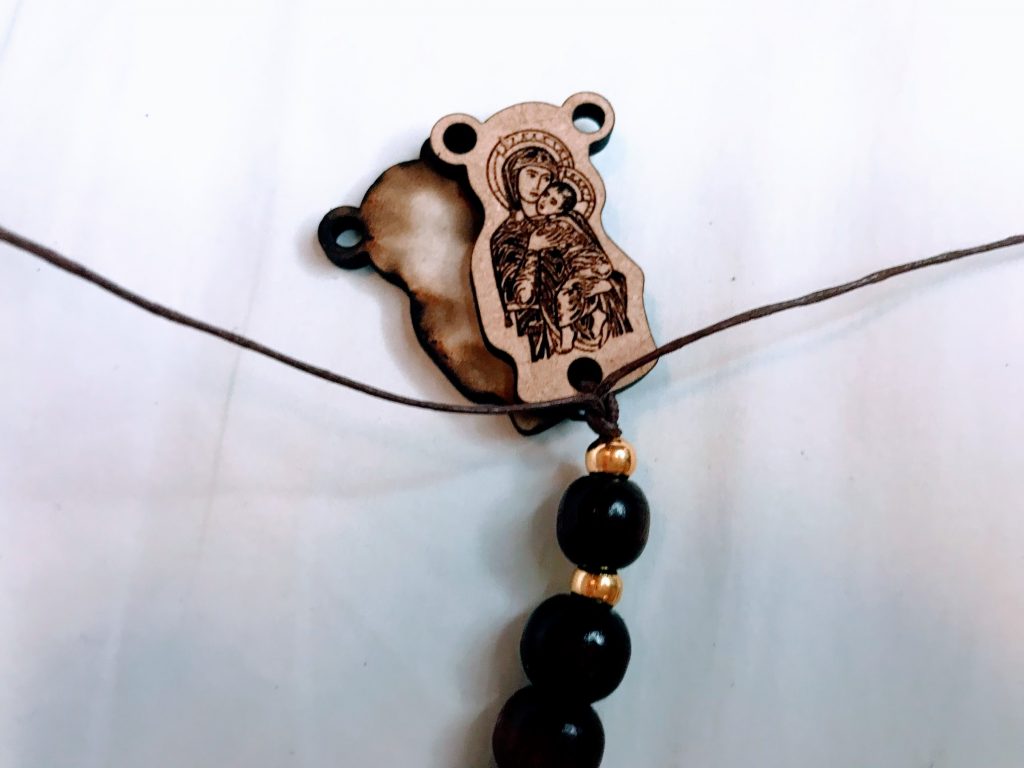
6. Stack the two centerpieces together and insert both threads into the bottom hole, from front to back.
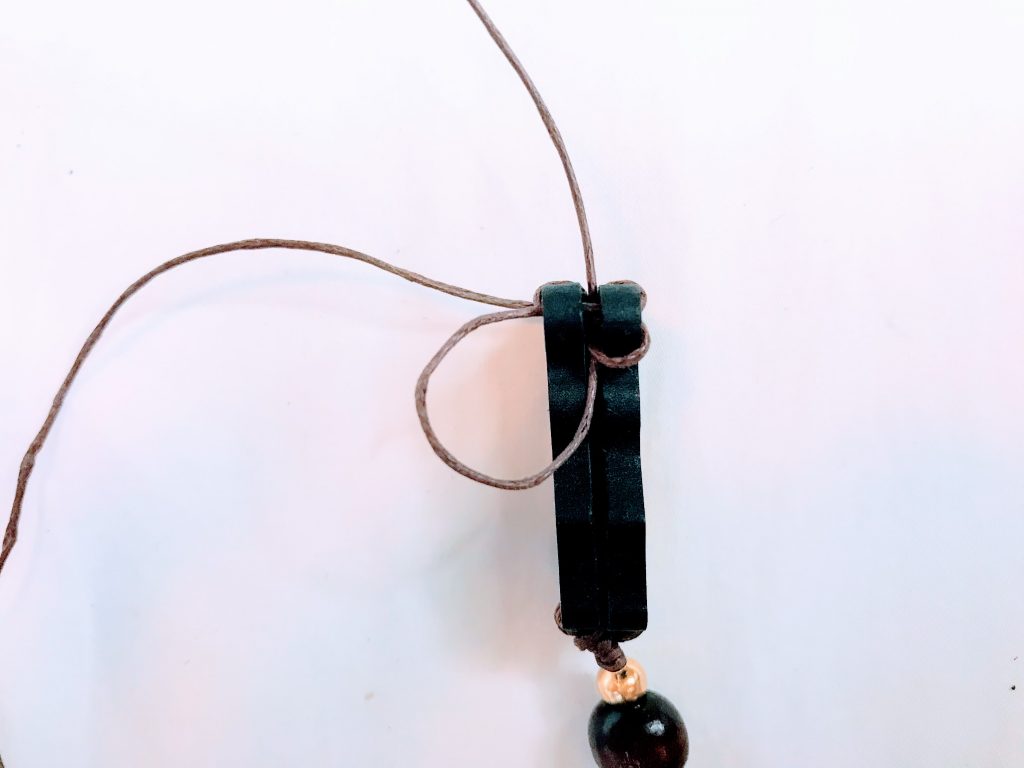
7. (Look out, here come some knots!) Pull the threads to tighten, then, holding a finger against the centerpiece and the top gold bead, loop the two threads around your finger and the strung beads. Insert the two thread ends into the loop created around your finger, pointing them up towards the centerpiece. Remove your finger and pull and wiggle to tighten, making sure the knot is seated between the centerpiece and the gold bead. Repeat, making another knot. Pull and wiggle to tighten.
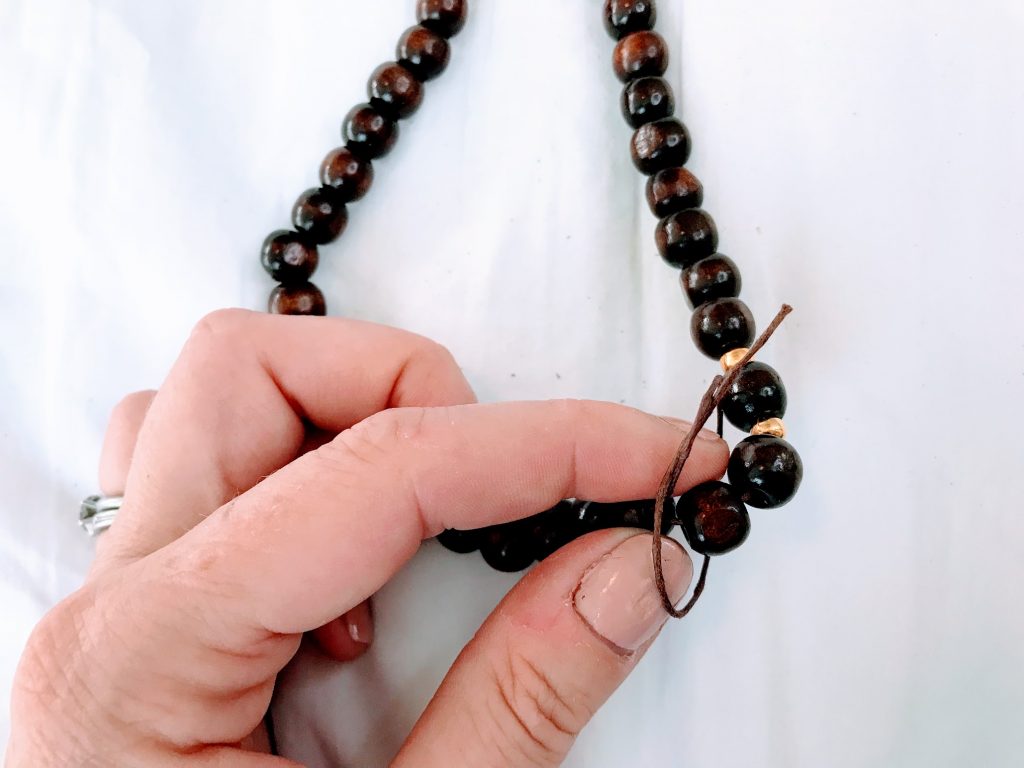
8. Split the two threads and the two centerpiece pieces. Bring one thread up on each side of the knot, and sandwich them between the centerpieces, coming out the top.
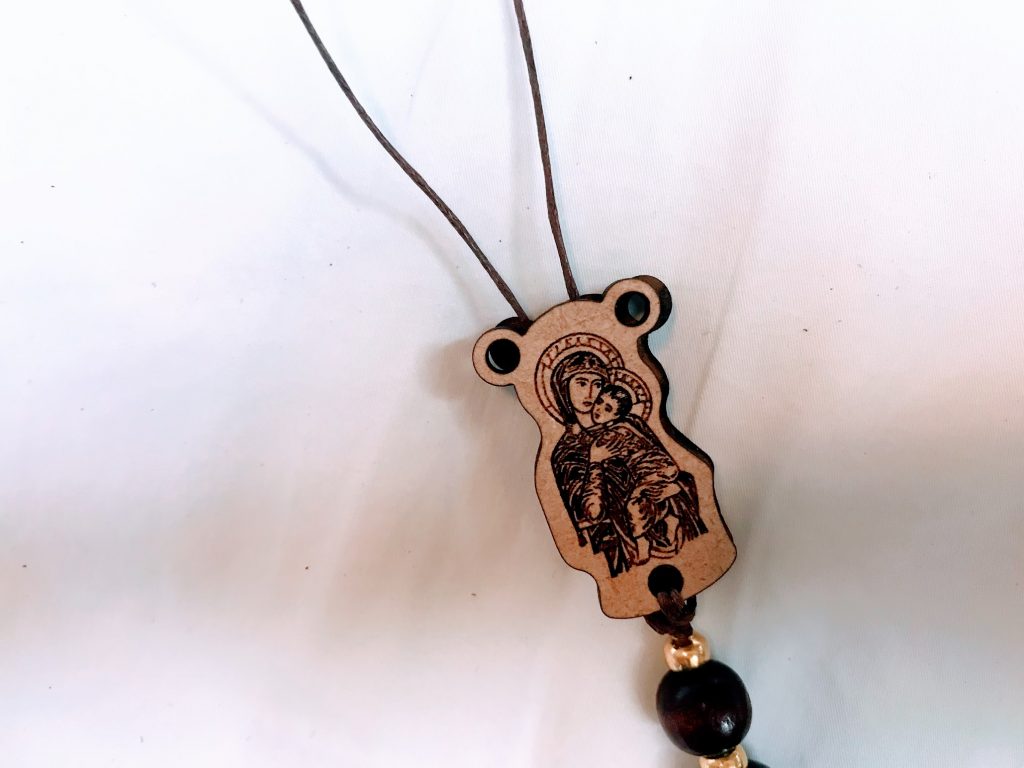
9. Holding the centerpieces pinched together with Mary facing you, insert the left thread forward through the two left holes and pull. Do the same on the right side. Now both threads are coming out of the top centerpiece holes towards you.
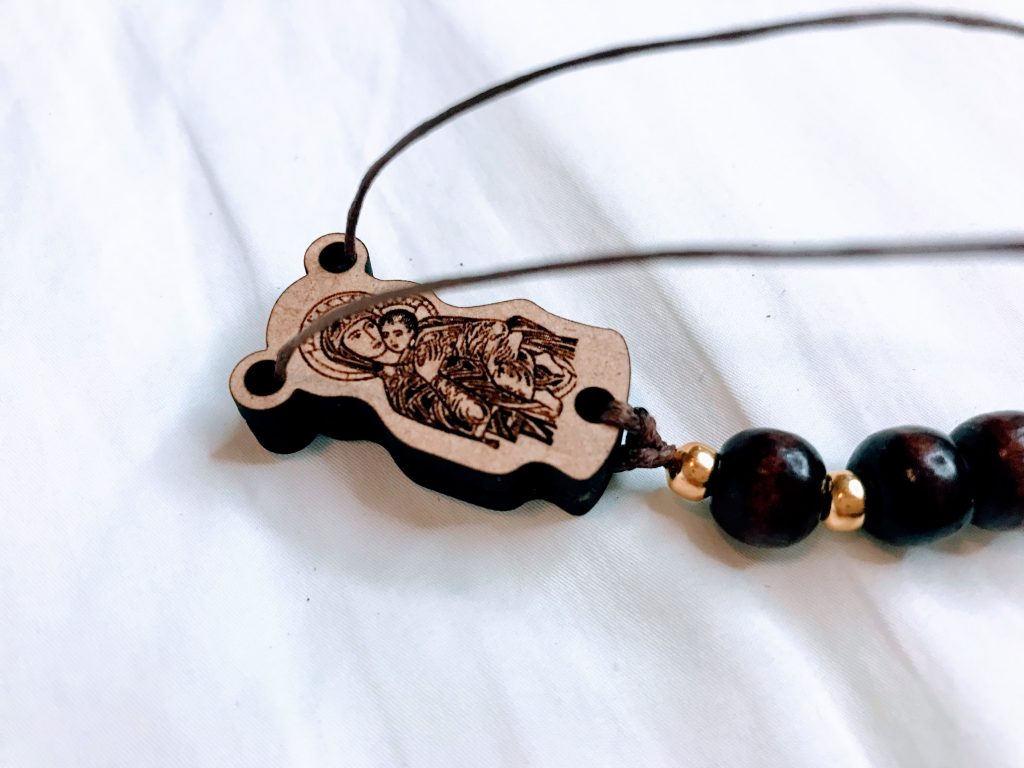
10. Gently wiggle the two centerpieces back and forth to separate them a bit. Insert the left thread between the centerpiece pieces down through the top and out the left side. Do the same with the right thread on the right side. Now both threads are coming out the sides of the centerpiece. Insert the left thread through the left holes again, from back to front, leaving it a bit loose to make a loop. Then feed the thread up through the loop you just made, pulling the thread up between this loop and the other loop already in the hole. Repeat on the right side. Tighten by pulling and wiggling the long threads. Now there is an individual thread coming out of each corner of the centerpiece.
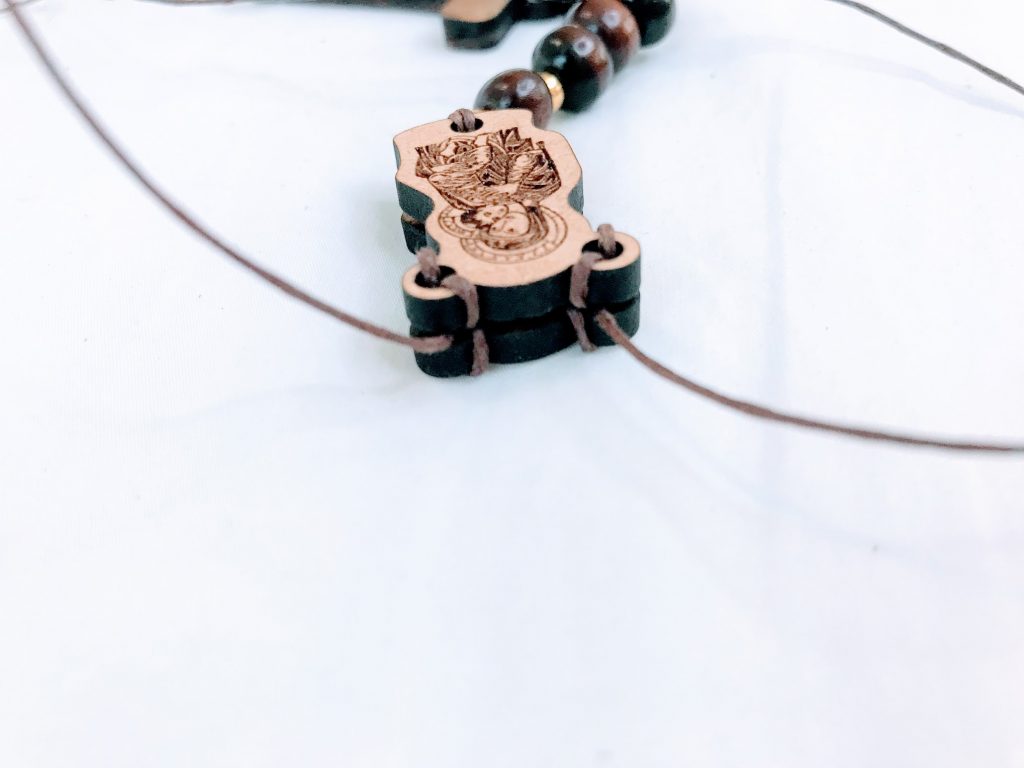
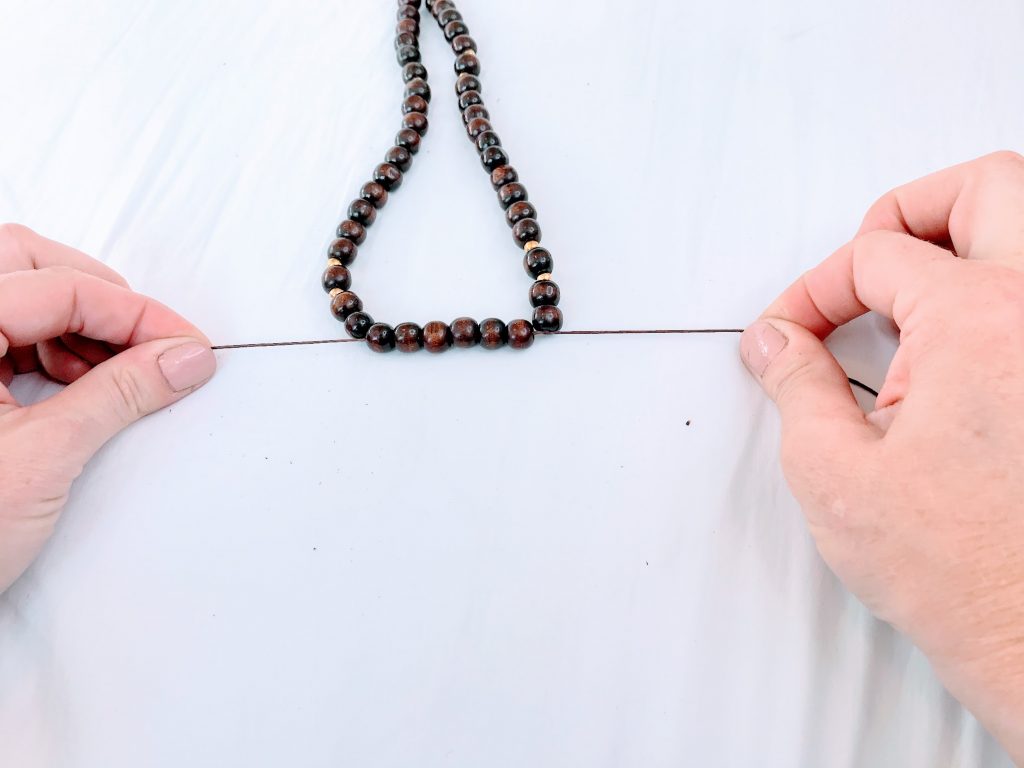
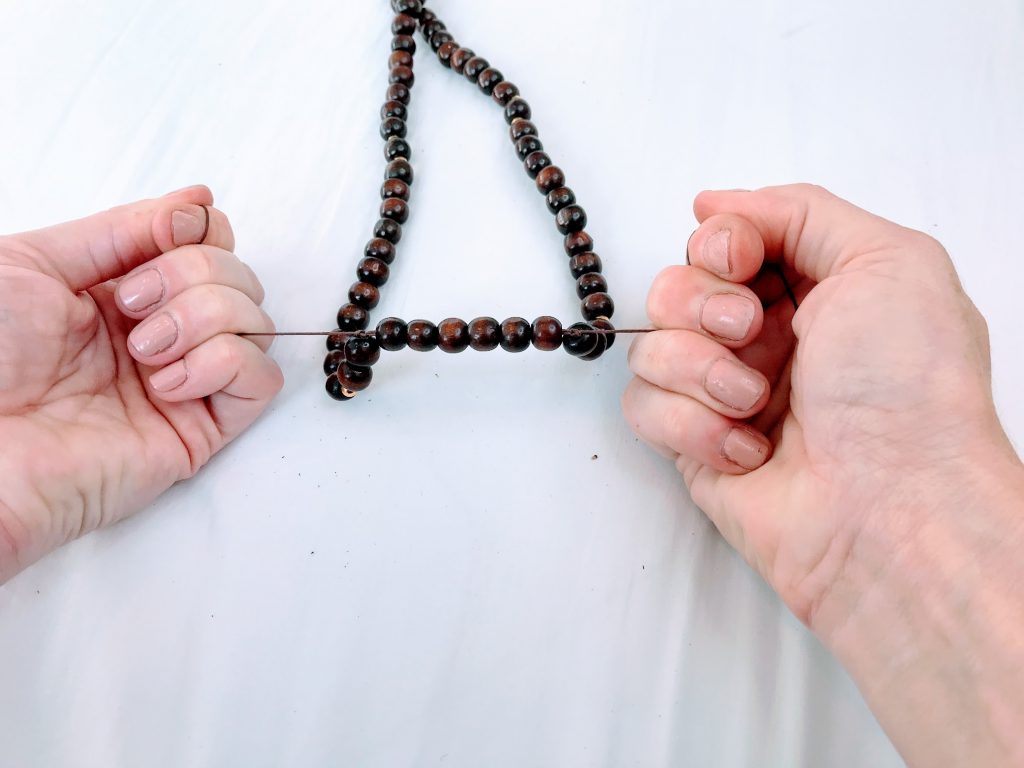
11. Beginning on the left side, insert one thread into beads in the following pattern G – Wx10 – G – W – G – Wx10 – G – Wx5. Repeat on the right side.
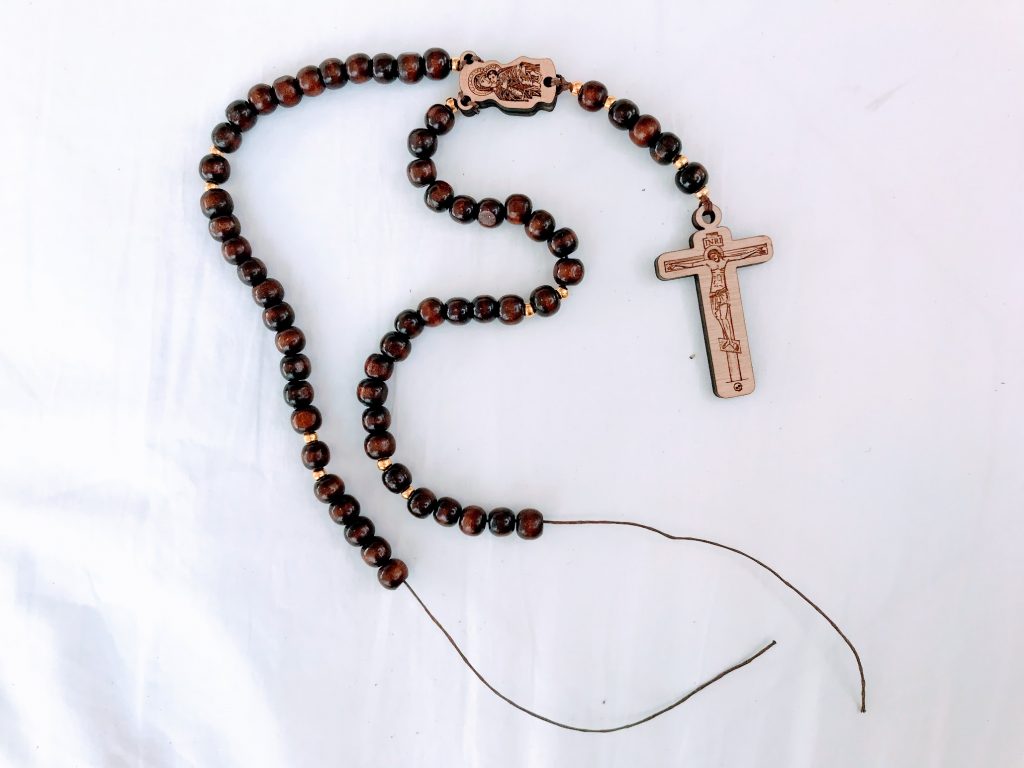
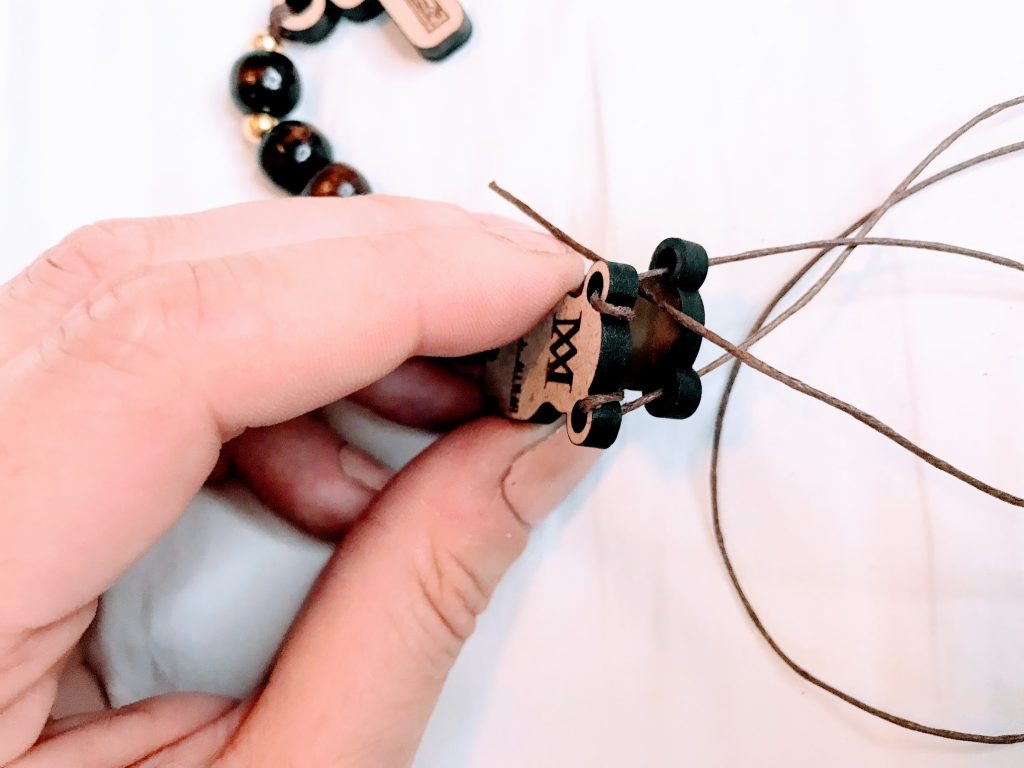
12. Tie a single left-over-right knot in the two threads to bring the two sides together.
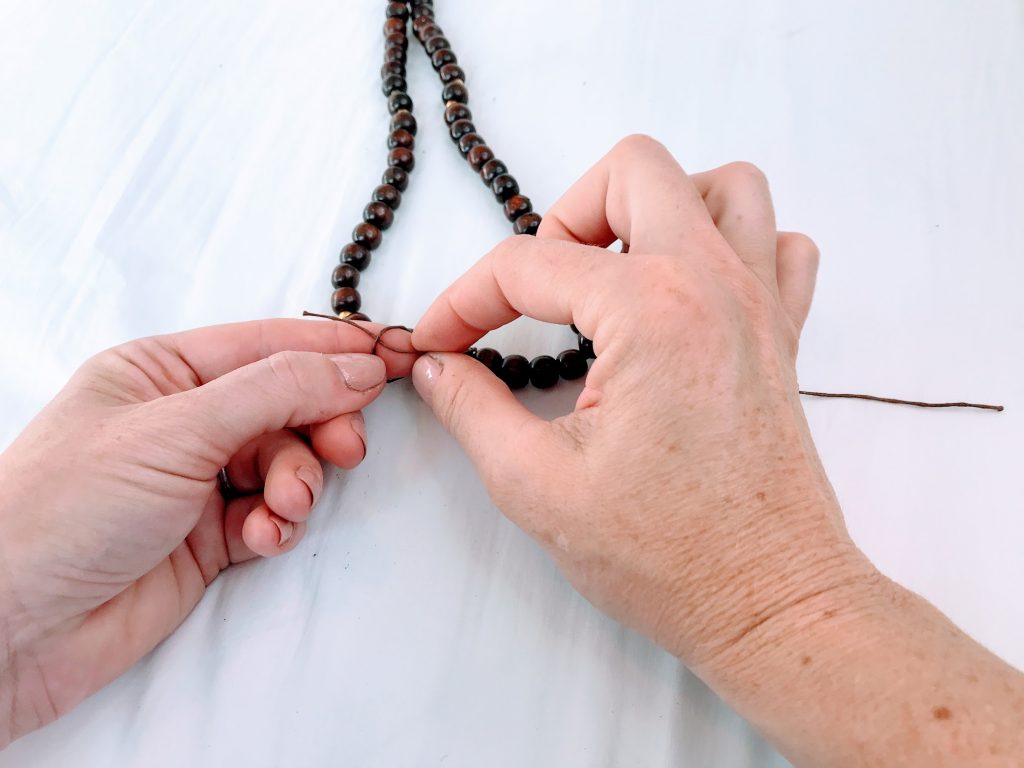
13. Insert the left side thread through three more beads to the right (these beads are already on the right side thread). Do the same on the right. You now have your two threads coming out of the rosary in opposite directions, with six double-threaded beads between them.
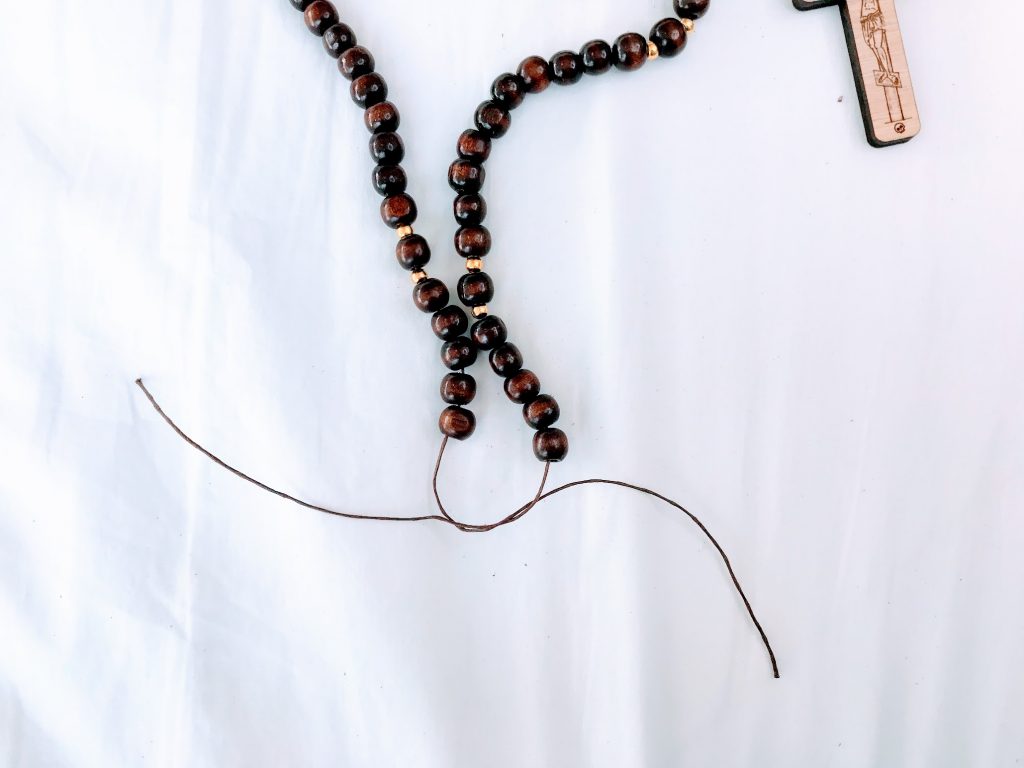
14. While gently pulling the beads taught with the left thread held tight in your pinky and ring-finger, knot the right thread. Loop the right thread around your finger and insert the thread through the loop towards the right.
15. Pull the two thread ends in opposite directions to tighten the knot.
16. Repeat, making a second knot. Do the same with the left thread, making two knots and pulling the threads in opposite directions to tighten.
17. Insert the left thread through two more beads to the left, then cut the tail off between the gold and wood beads. Do the same on the right.
18. Ask a priest to bless your rosary if possible, and get to praying!
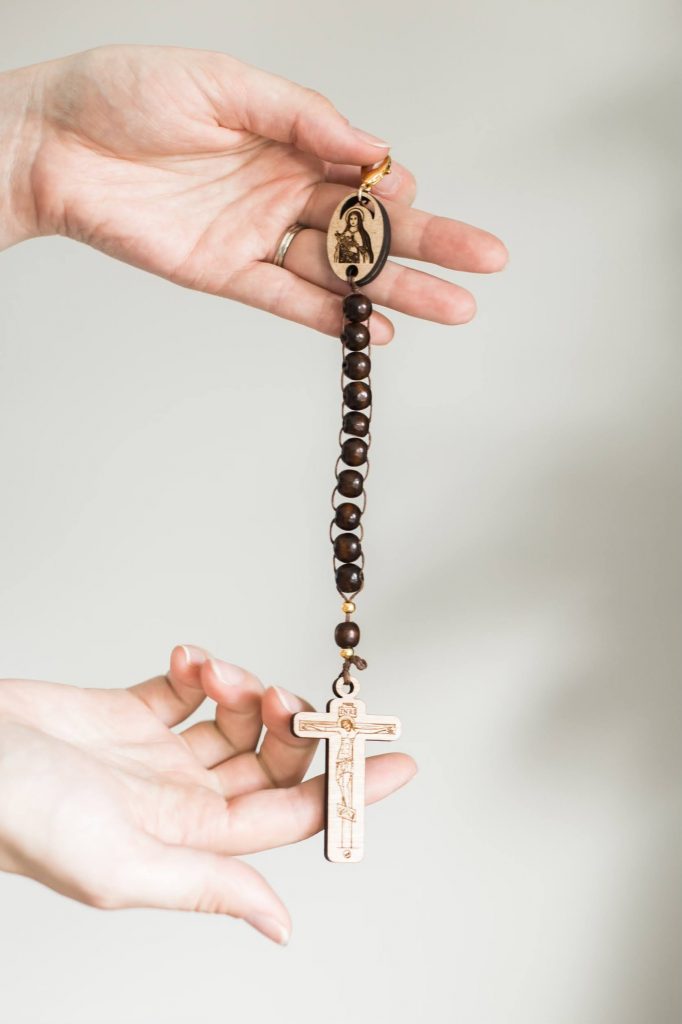
Making a Single-Decade Rosary / St. Thérèse Sacrifice Beads
SUPPLIES
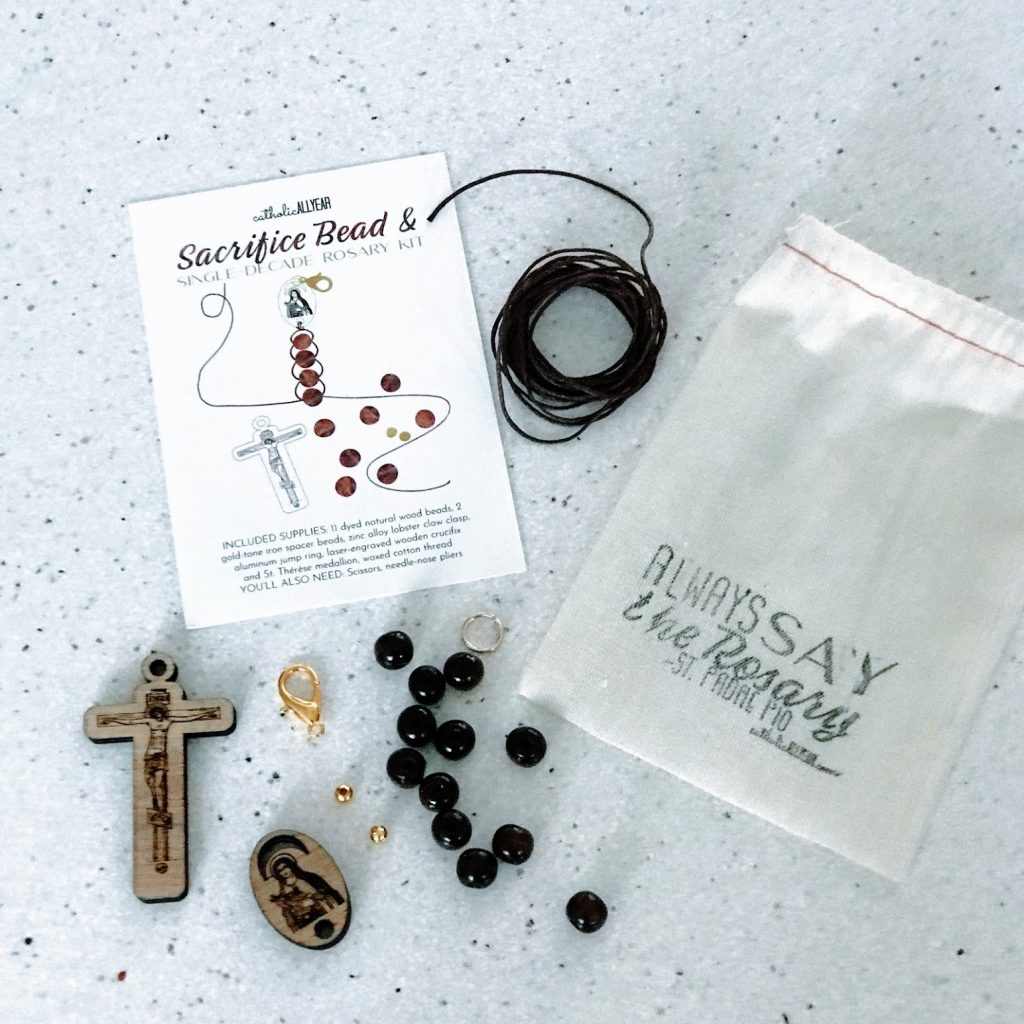
- 11 beads (these can all be the same, or you can choose one type of bead for the 10 ave beads, and a different bead for the pater beads). I used 10mm wooden beads with a 3mm hole.
- 2 spacer beads. I used gold-tone iron beads, 5mm with a 2mm hole.
- a crucifix
- a lobster claw clasp
- a jump ring
- a saint medallion. I used St. Thérèse.
- 3 feet string. I used 1.5mm waxed cotton thread.
- scissors
- small needle-nose pliers
INSTRUCTIONS
- Cut a three foot length of thread.
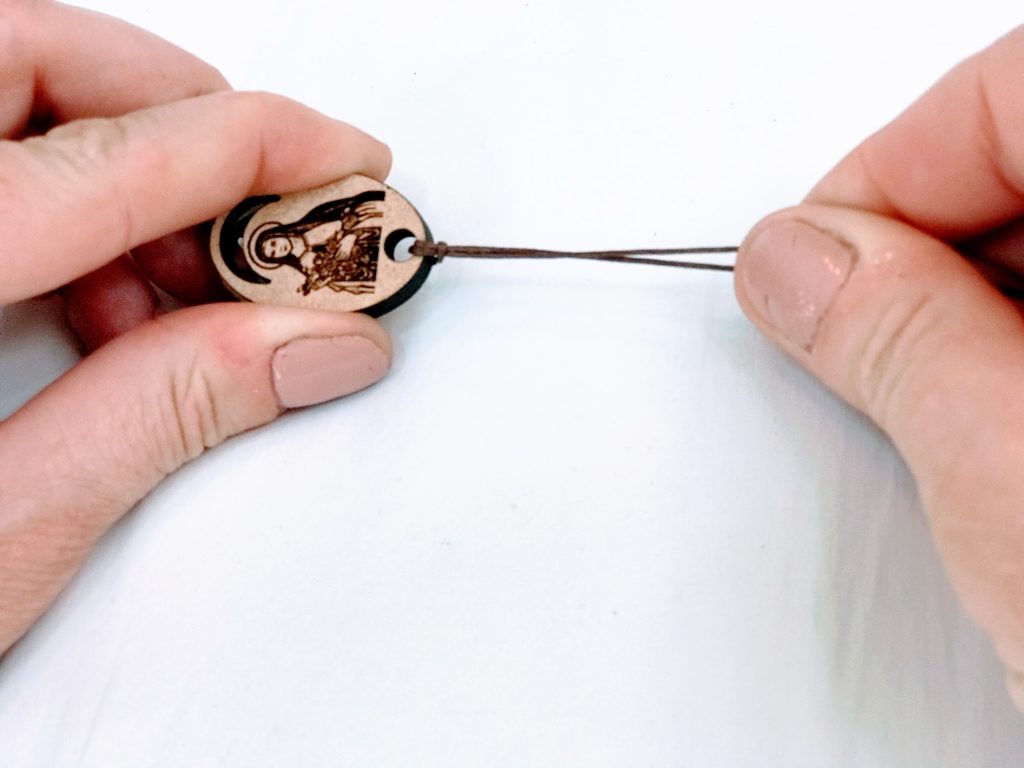
2. Fold the length of thread in half. Insert the loop end through the hole of the St. Thérèse medallion from front to back and put the two cut ends through the loop.
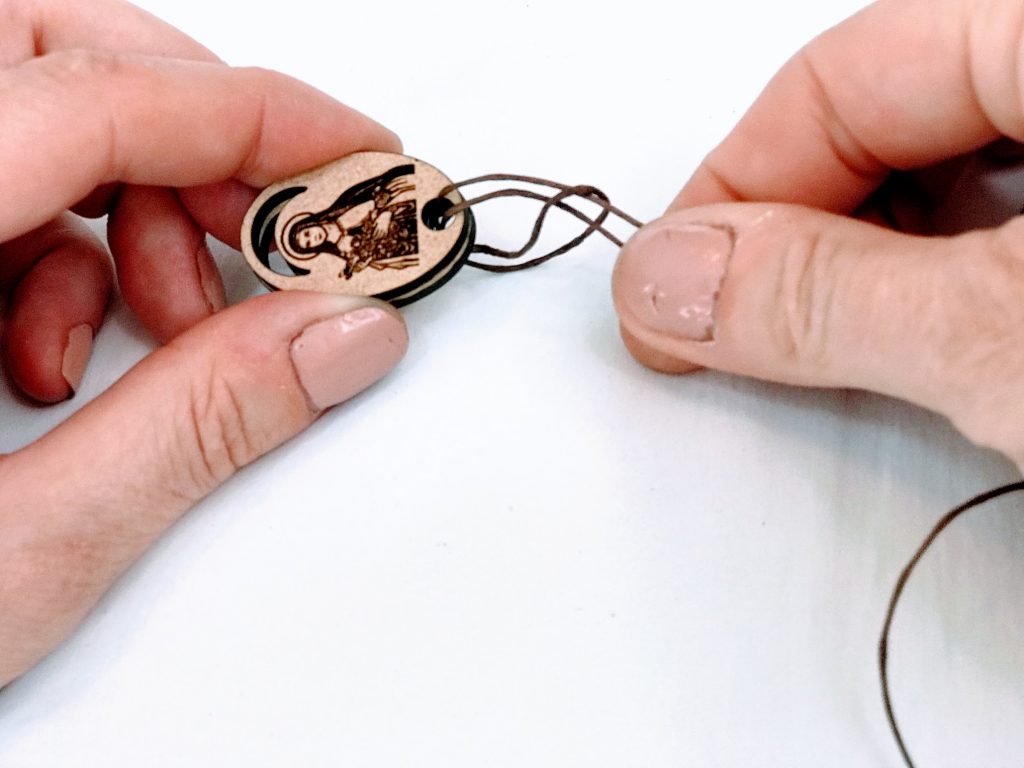
3.Pull and wiggle to tighten the loop down on the medallion.
4. If necessary, trim the ends a bit so they are un-frayed and even. Split the two threads apart. Insert the left thread through a wood bead horizontally from left to right. Then insert the right thread into the same bead from right to left. Pull the threads in opposite directions to tighten.
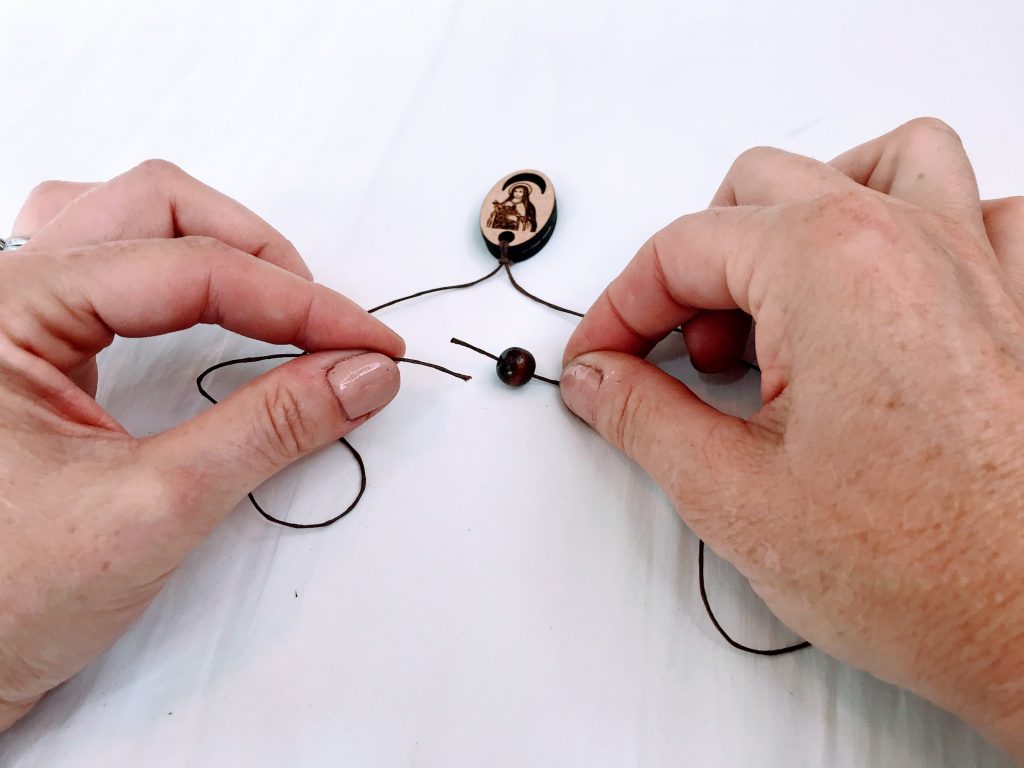
5. Repeat with nine more wood beads. Pull each one gently tight.
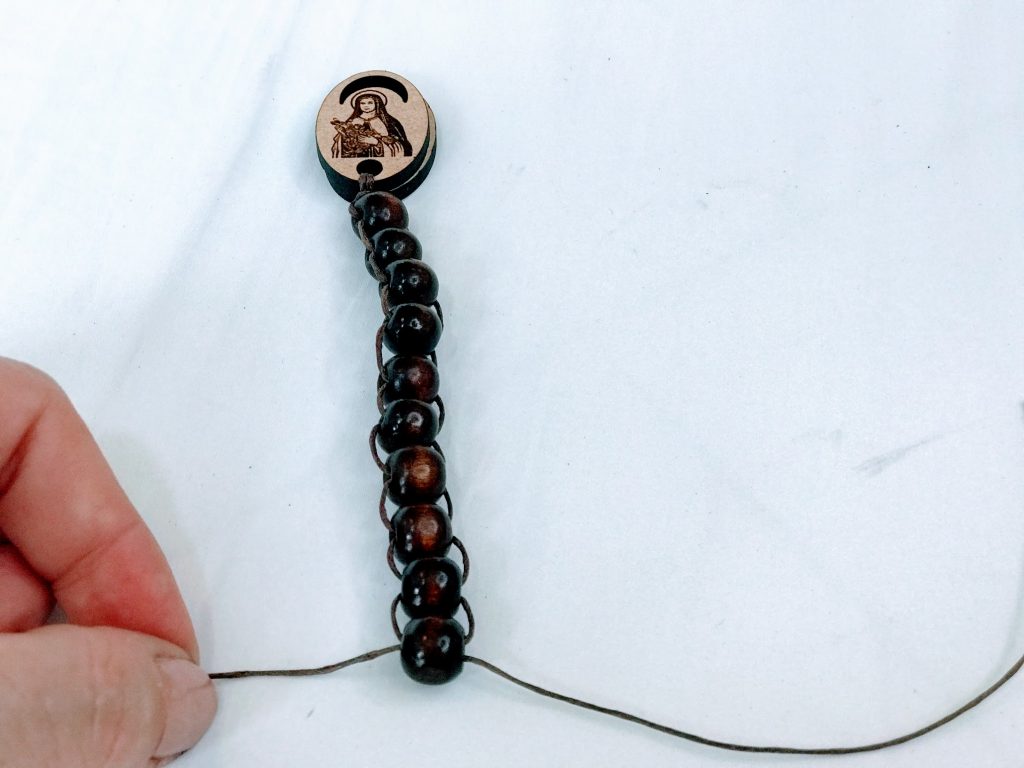
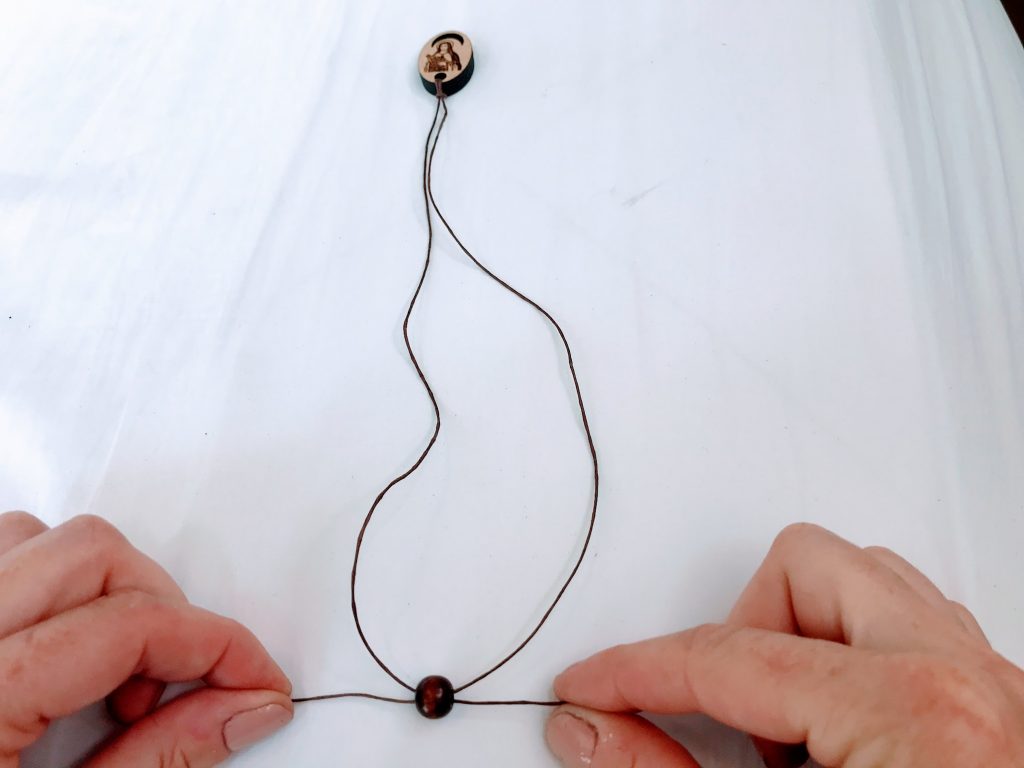
6. Adjust each bead individually to be horizontal, and adjust the threads to be gently tight. Trim the very ends of the two threads to be even.
7. Insert both threads together vertically into a gold bead, then a wood bead, then a gold bead.
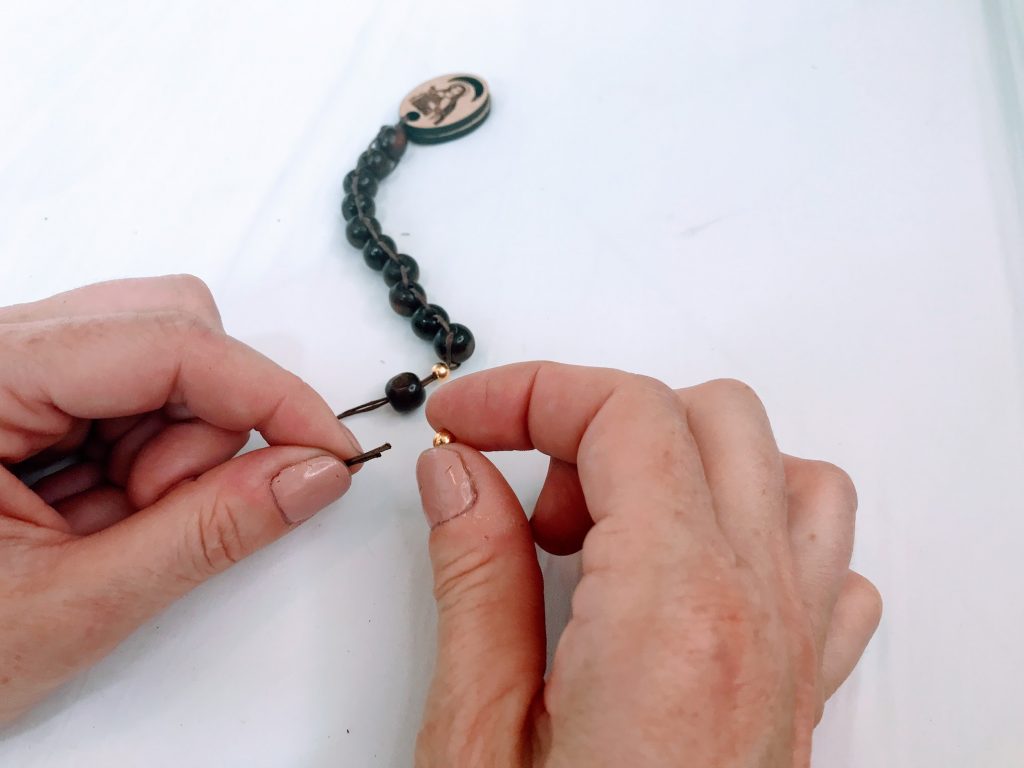
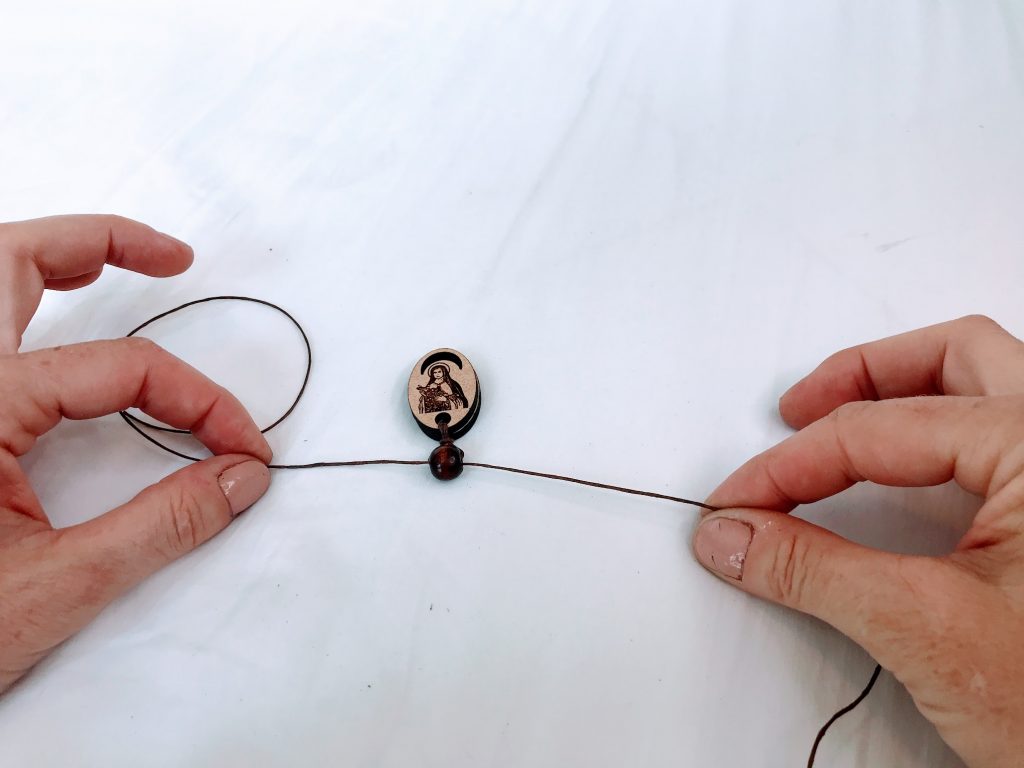
8. Tug the bottom horizontal bead down a bit, to leave an opening a little less than one bead-width.

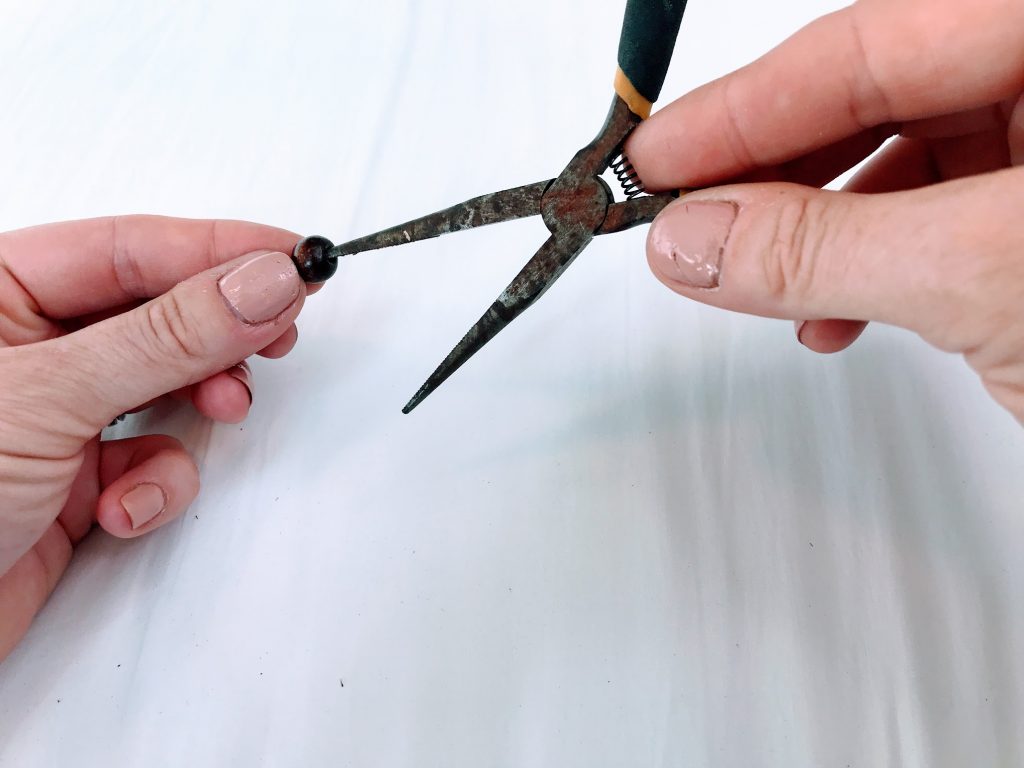
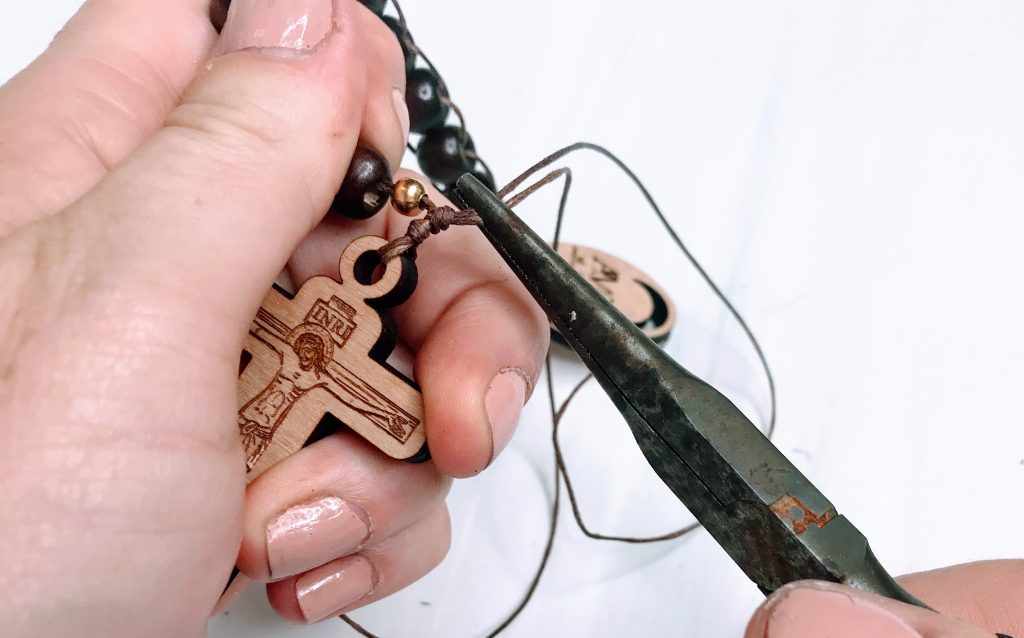
9. Insert both threads through the hole in the crucifix, front to back. Pull it up towards the gold bead. Hold your finger alongside the gold bead and top of the crucifix. Loop the threads around your finger and insert the tail of the threads up through the finger loop to make a knot. Pull and wiggle to tighten.
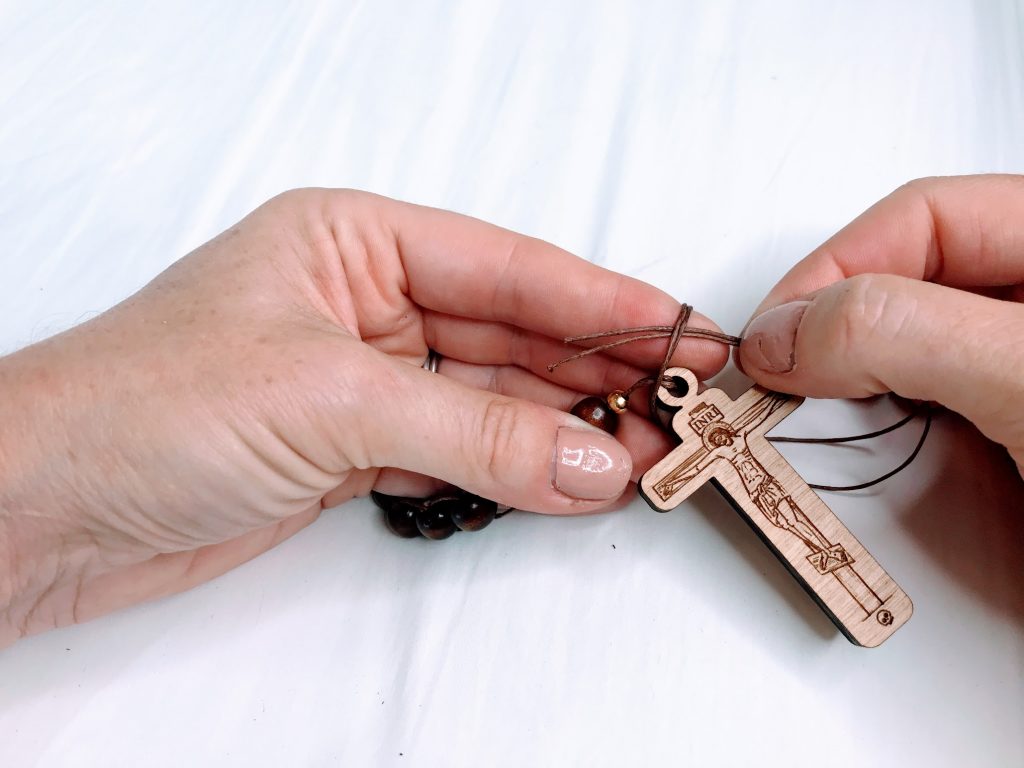
10. Tie a second knot in the same manner, pulling it as tight as possible.
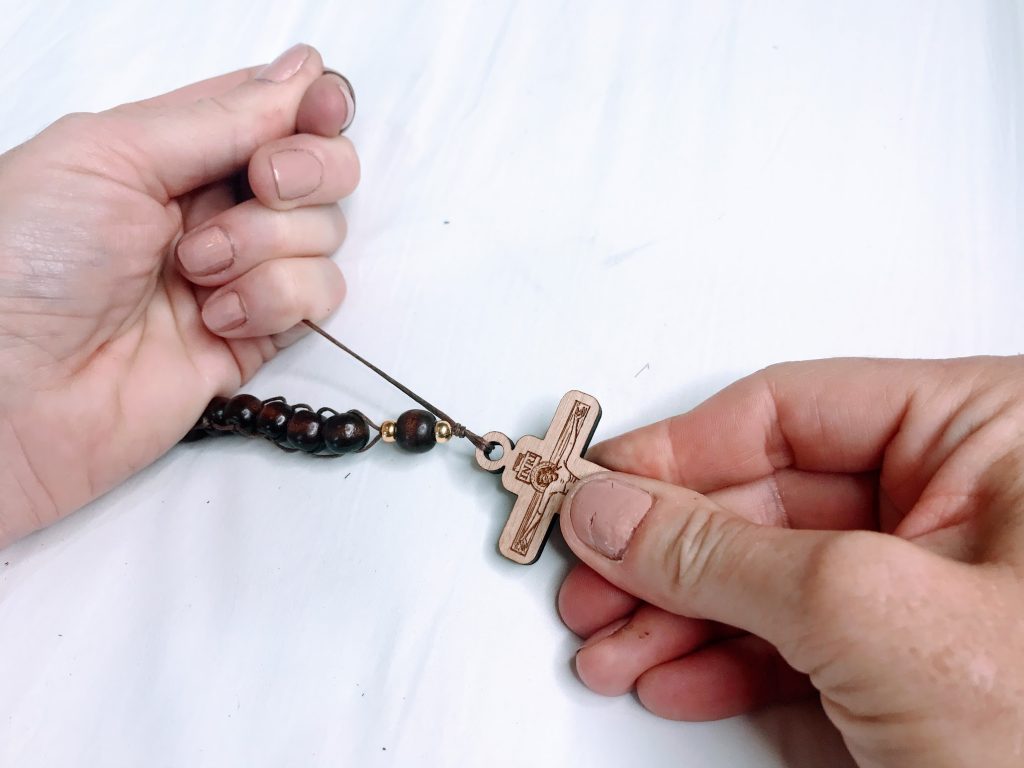
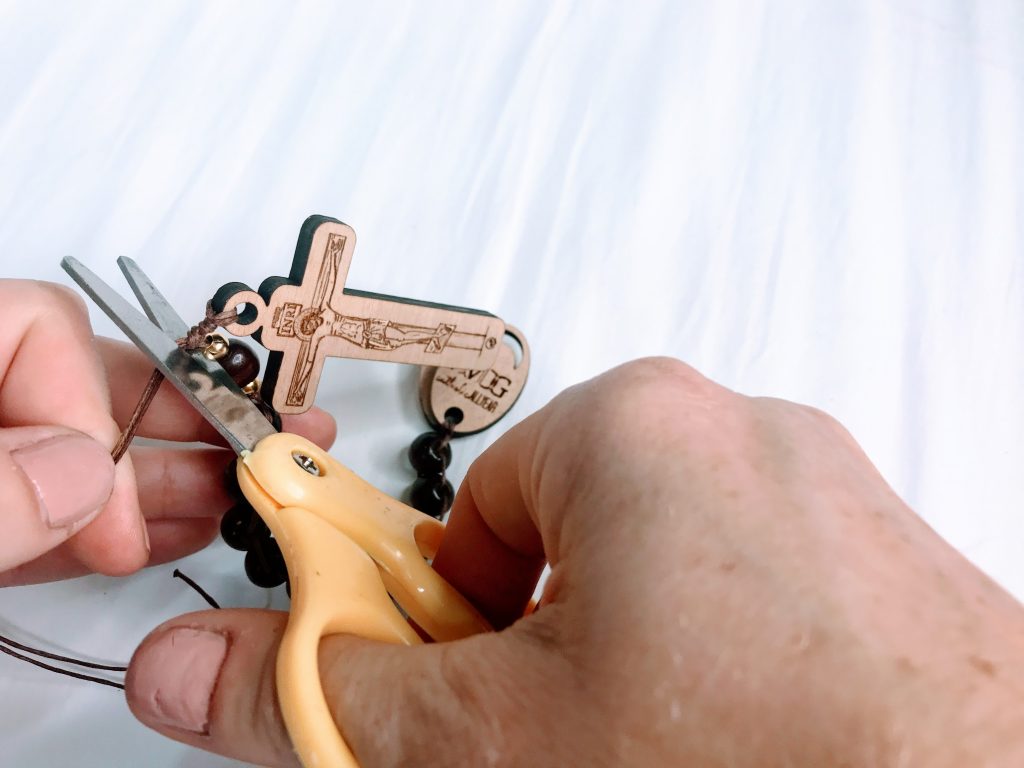
11. Use pliers to pull it really tight, then trim the threads off close to the knot.
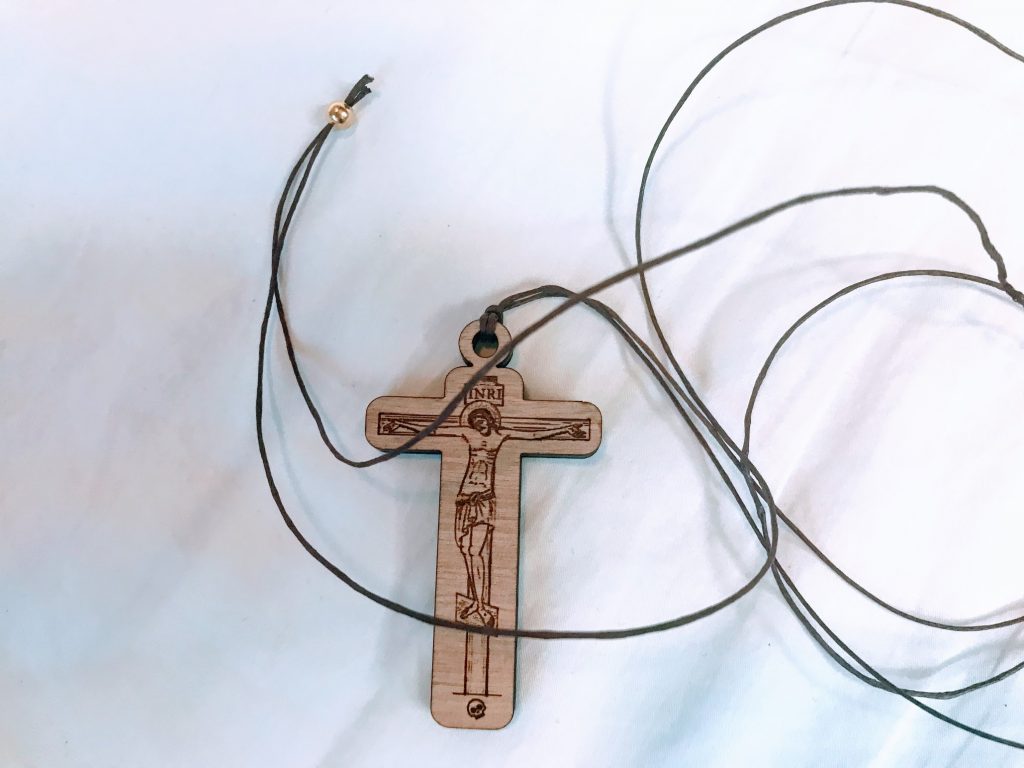
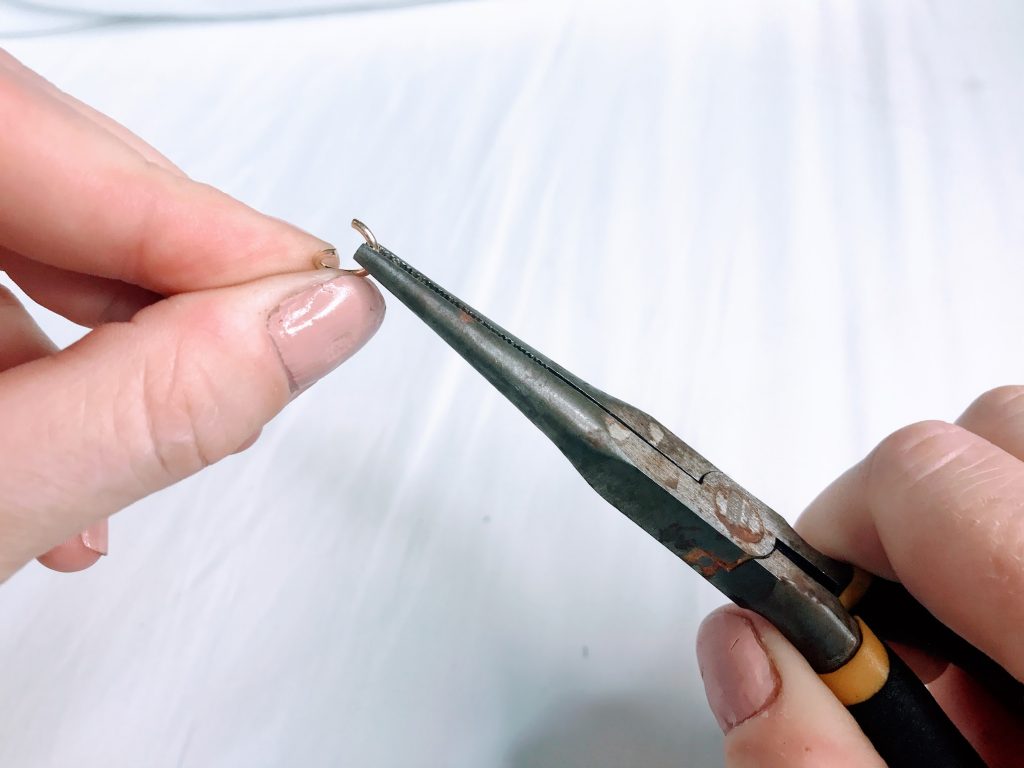
12. Use pliers to twist (rather than spread) the jump ring open.
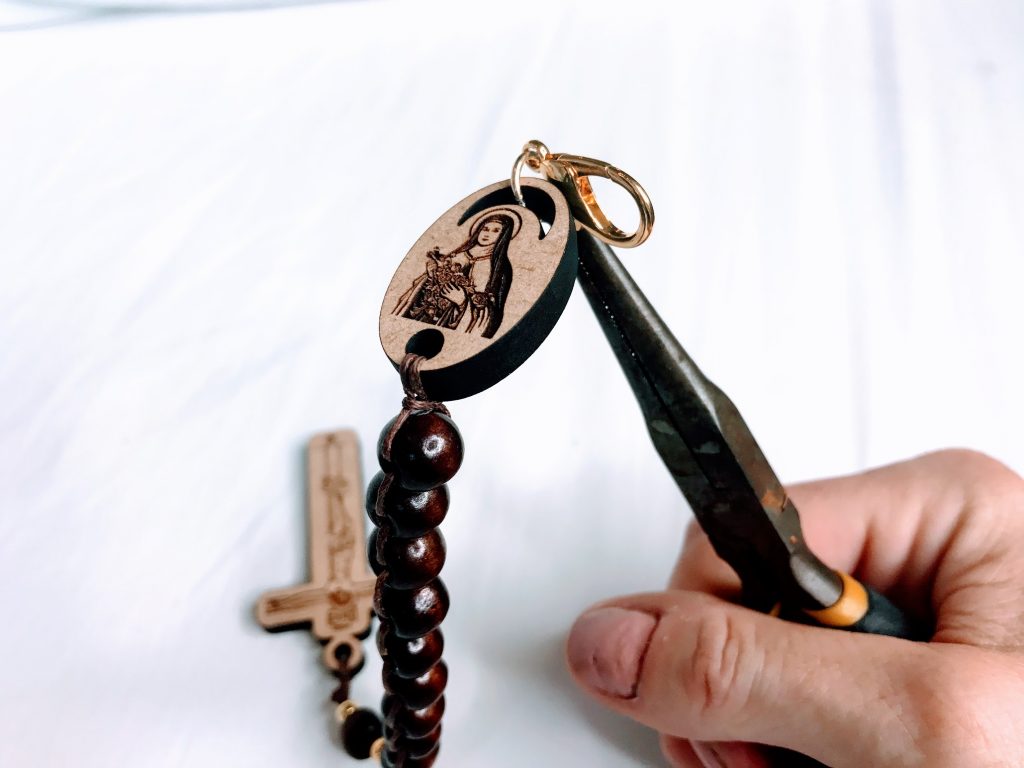
13. Insert the clasp onto the jump ring, thread the open jump ring into the moon-shaped opening at the top of the medallion, and pinch the jump ring closed with the pliers. If your saint medal has only one hole, use it for both the string and the jump ring + hook.
14. Tidy up after yourself and you’ve got your first sacrifice to record!
You might also enjoy this blog post:
The Family Rosary: Why is it SO Hard?
And this video:

Step 11 is missing a W-G before the last W5. The kit needs 14 G and came with only 13, so I took one off by the Mary piece. The “3” extra W ended up being only one extra. But I made it!
Thank you, I’ll take a look at that.